Setting attributes on Live Chat users
Online businesses often need to support different user experiences for different types of customers, such as anonymous visitors or known users.
At the same time, customer support agents need to know which customer they are talking to, be confident that they can share private information with them, and ultimately be able to host efficient and effective conversations by using information that they already know about the customer.
In this guide, we'll walk you through how to pass customer data, known as an "attribute", to the Omnichannel Widget, to help you identify users when they reach out over Live Chat.
What are customer data attributes?
First, let's define what we mean by “customer data attributes”.
A customer data attribute is custom data information about your customer that enriches their anonymous contact profile and can identify them as a customer.
This custom data can be set on anonymous or identified users and will be passed through to your Inbox contact center via Flow Builder.
This allows you to create custom logic flows, based on the attributes that are passed.
Setting attributes on your javascript snippet
Start passing information about your users to the Omnichannel Widget by setting attributes via the method in the snippet below.
Inside the .setAttributes, you can now add your standard and custom data attributes as described above
window.MessageBirdChatWidget.setAttributes({email: "hello@test.com",phone: "+31 123 456 789",premiumUser: true,itemsInCart: 2})
This method takes an object with the keys and values that you would like to have on your visitor’s contact profile in Inbox.
These values can only be primitive values — a string, number, or a boolean.
These values will only be attached to the visitor when the visitor sends a message from the Omnichannel Widget.
The attributes passed will then be persisted on the contact of the visitor, via the steps below: The attributes passed are last write wins. If you were to pass different values under the same key, the value that was sent last will overwrite the previous value of the key.
Mapping your attributes in Flow Builder
Now you've set your desired attributes in your Omnichannel Widget Javascript snippet, it's time to set these attributes in Flow Builder.
To update the contact profile of the user who sent the message from the Omnichannel Widget, you need to add a step in Flow Builder.
Please keep in mind that these values will only be attached to the visitor when the visitor sends a message from the Omnichannel Widget.
- Go to Inbox and navigate to the flow where you have enabled your Live Chat channel
- Drag the "Update Inbox Contact" step into the Flow, before the "Create Inbox Ticket" step
- Now, go to the step settings and add {{message.metadata.attributes}} to the custom contact attributes part of the step
{' '}
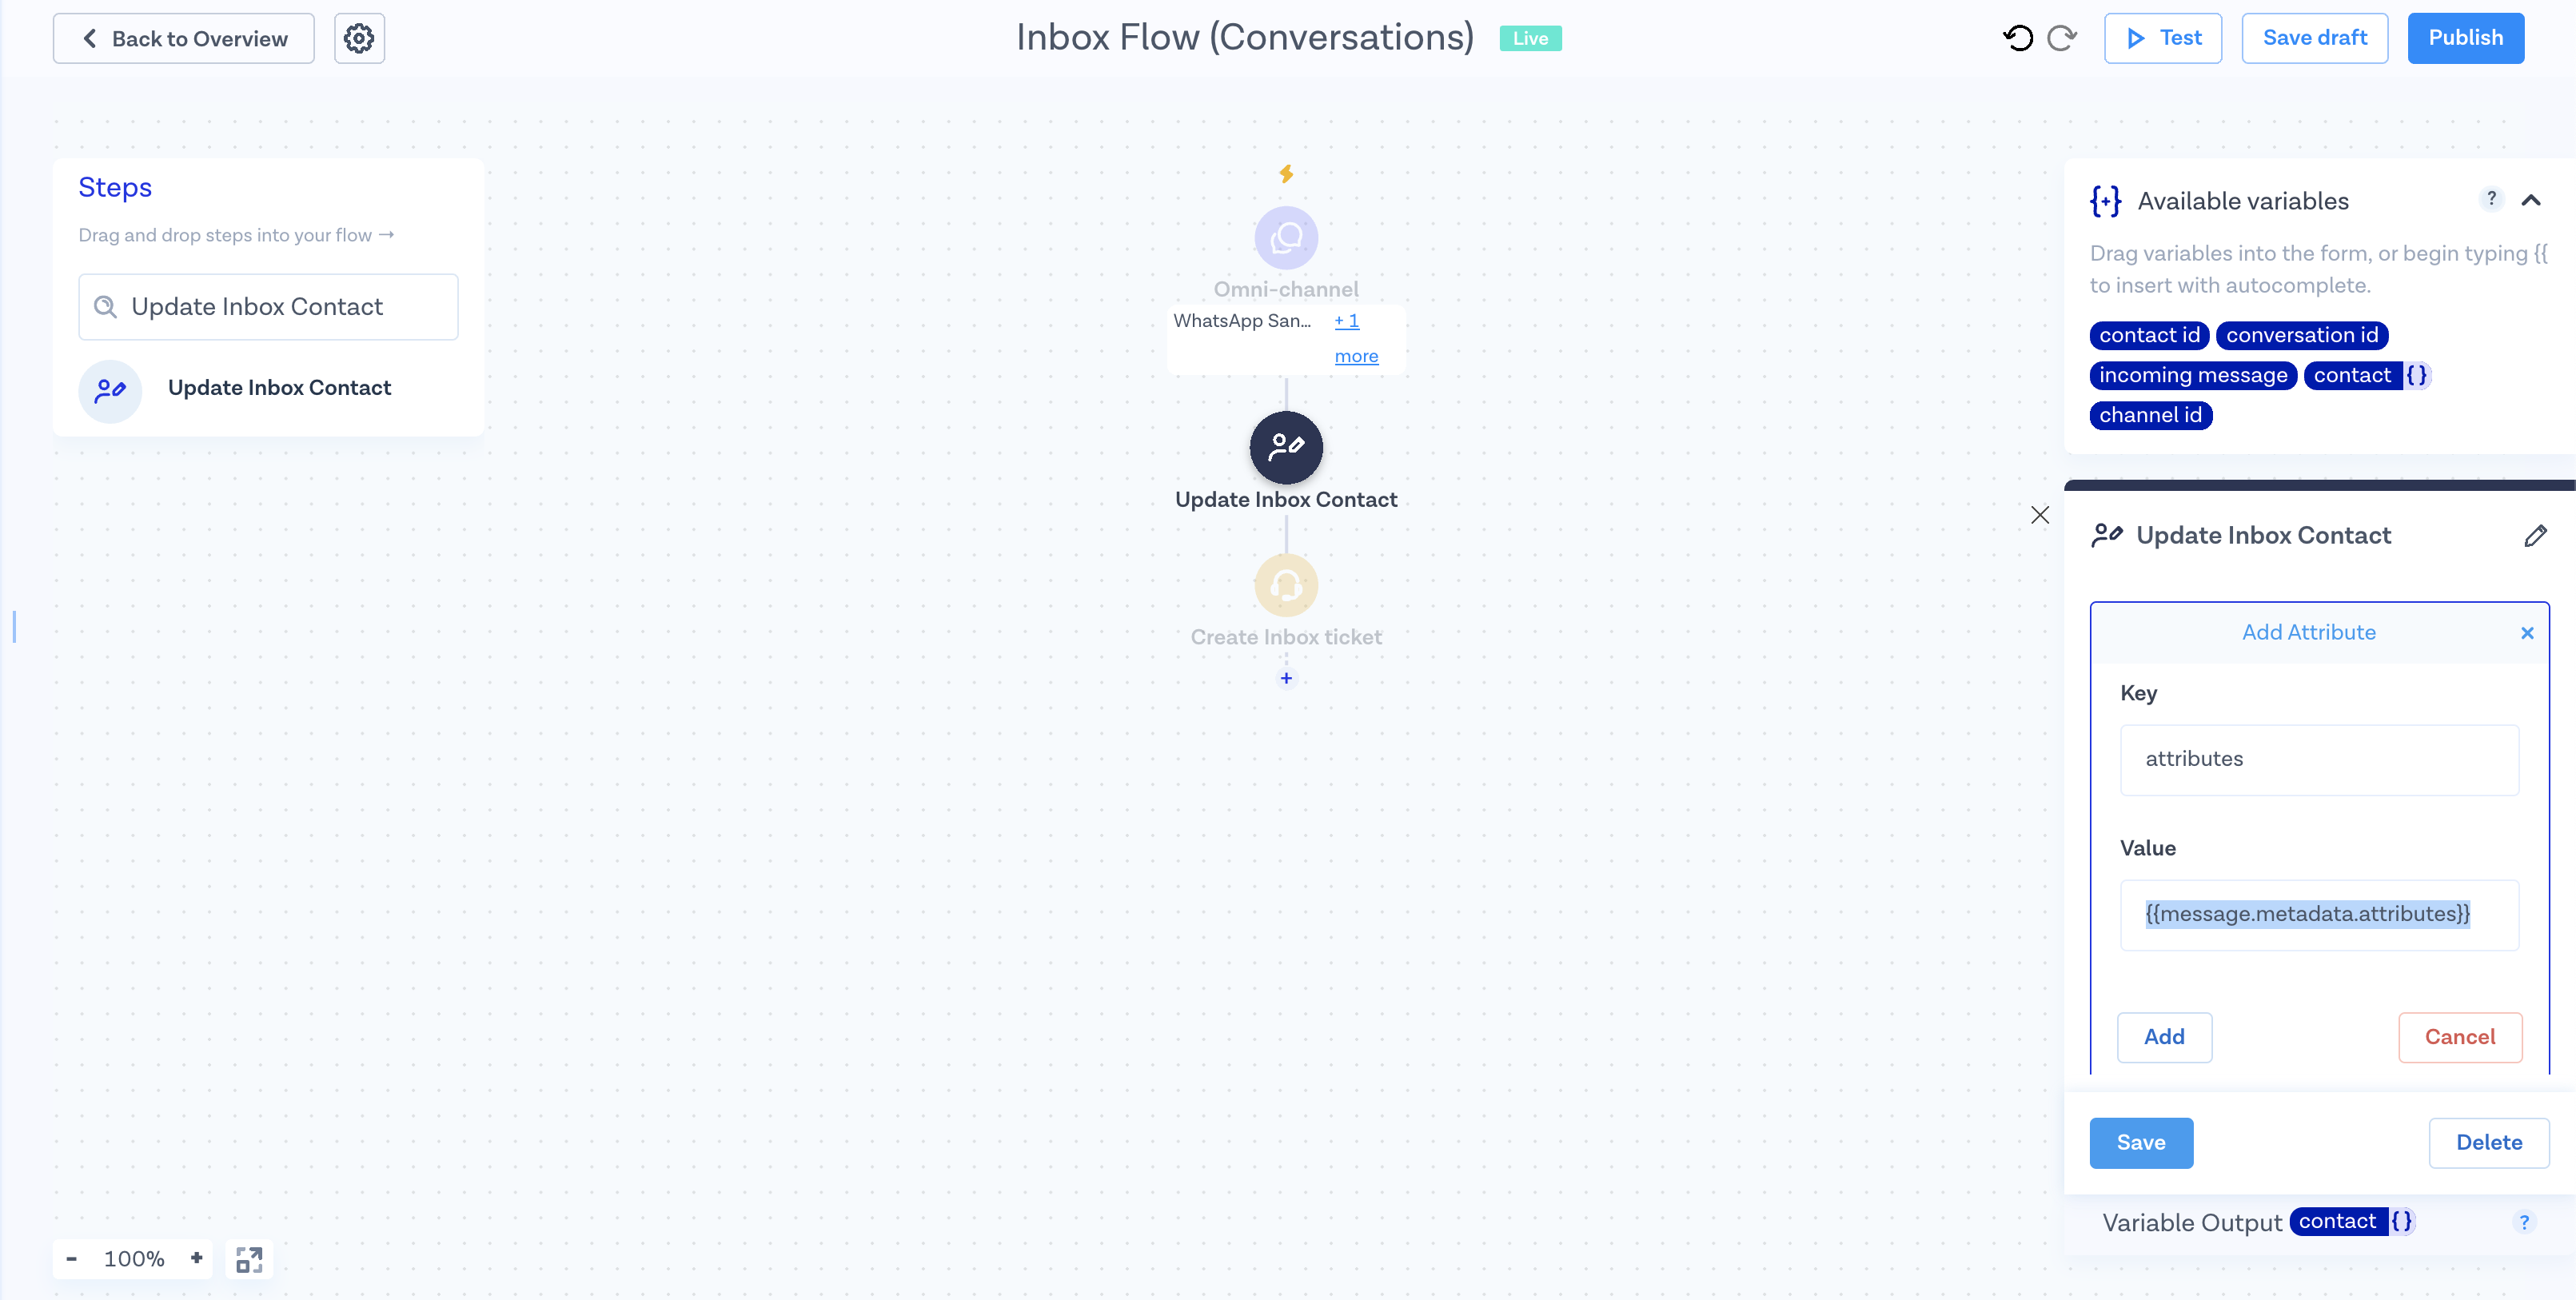
- Save the attributes to the step by clicking Click Add and Save
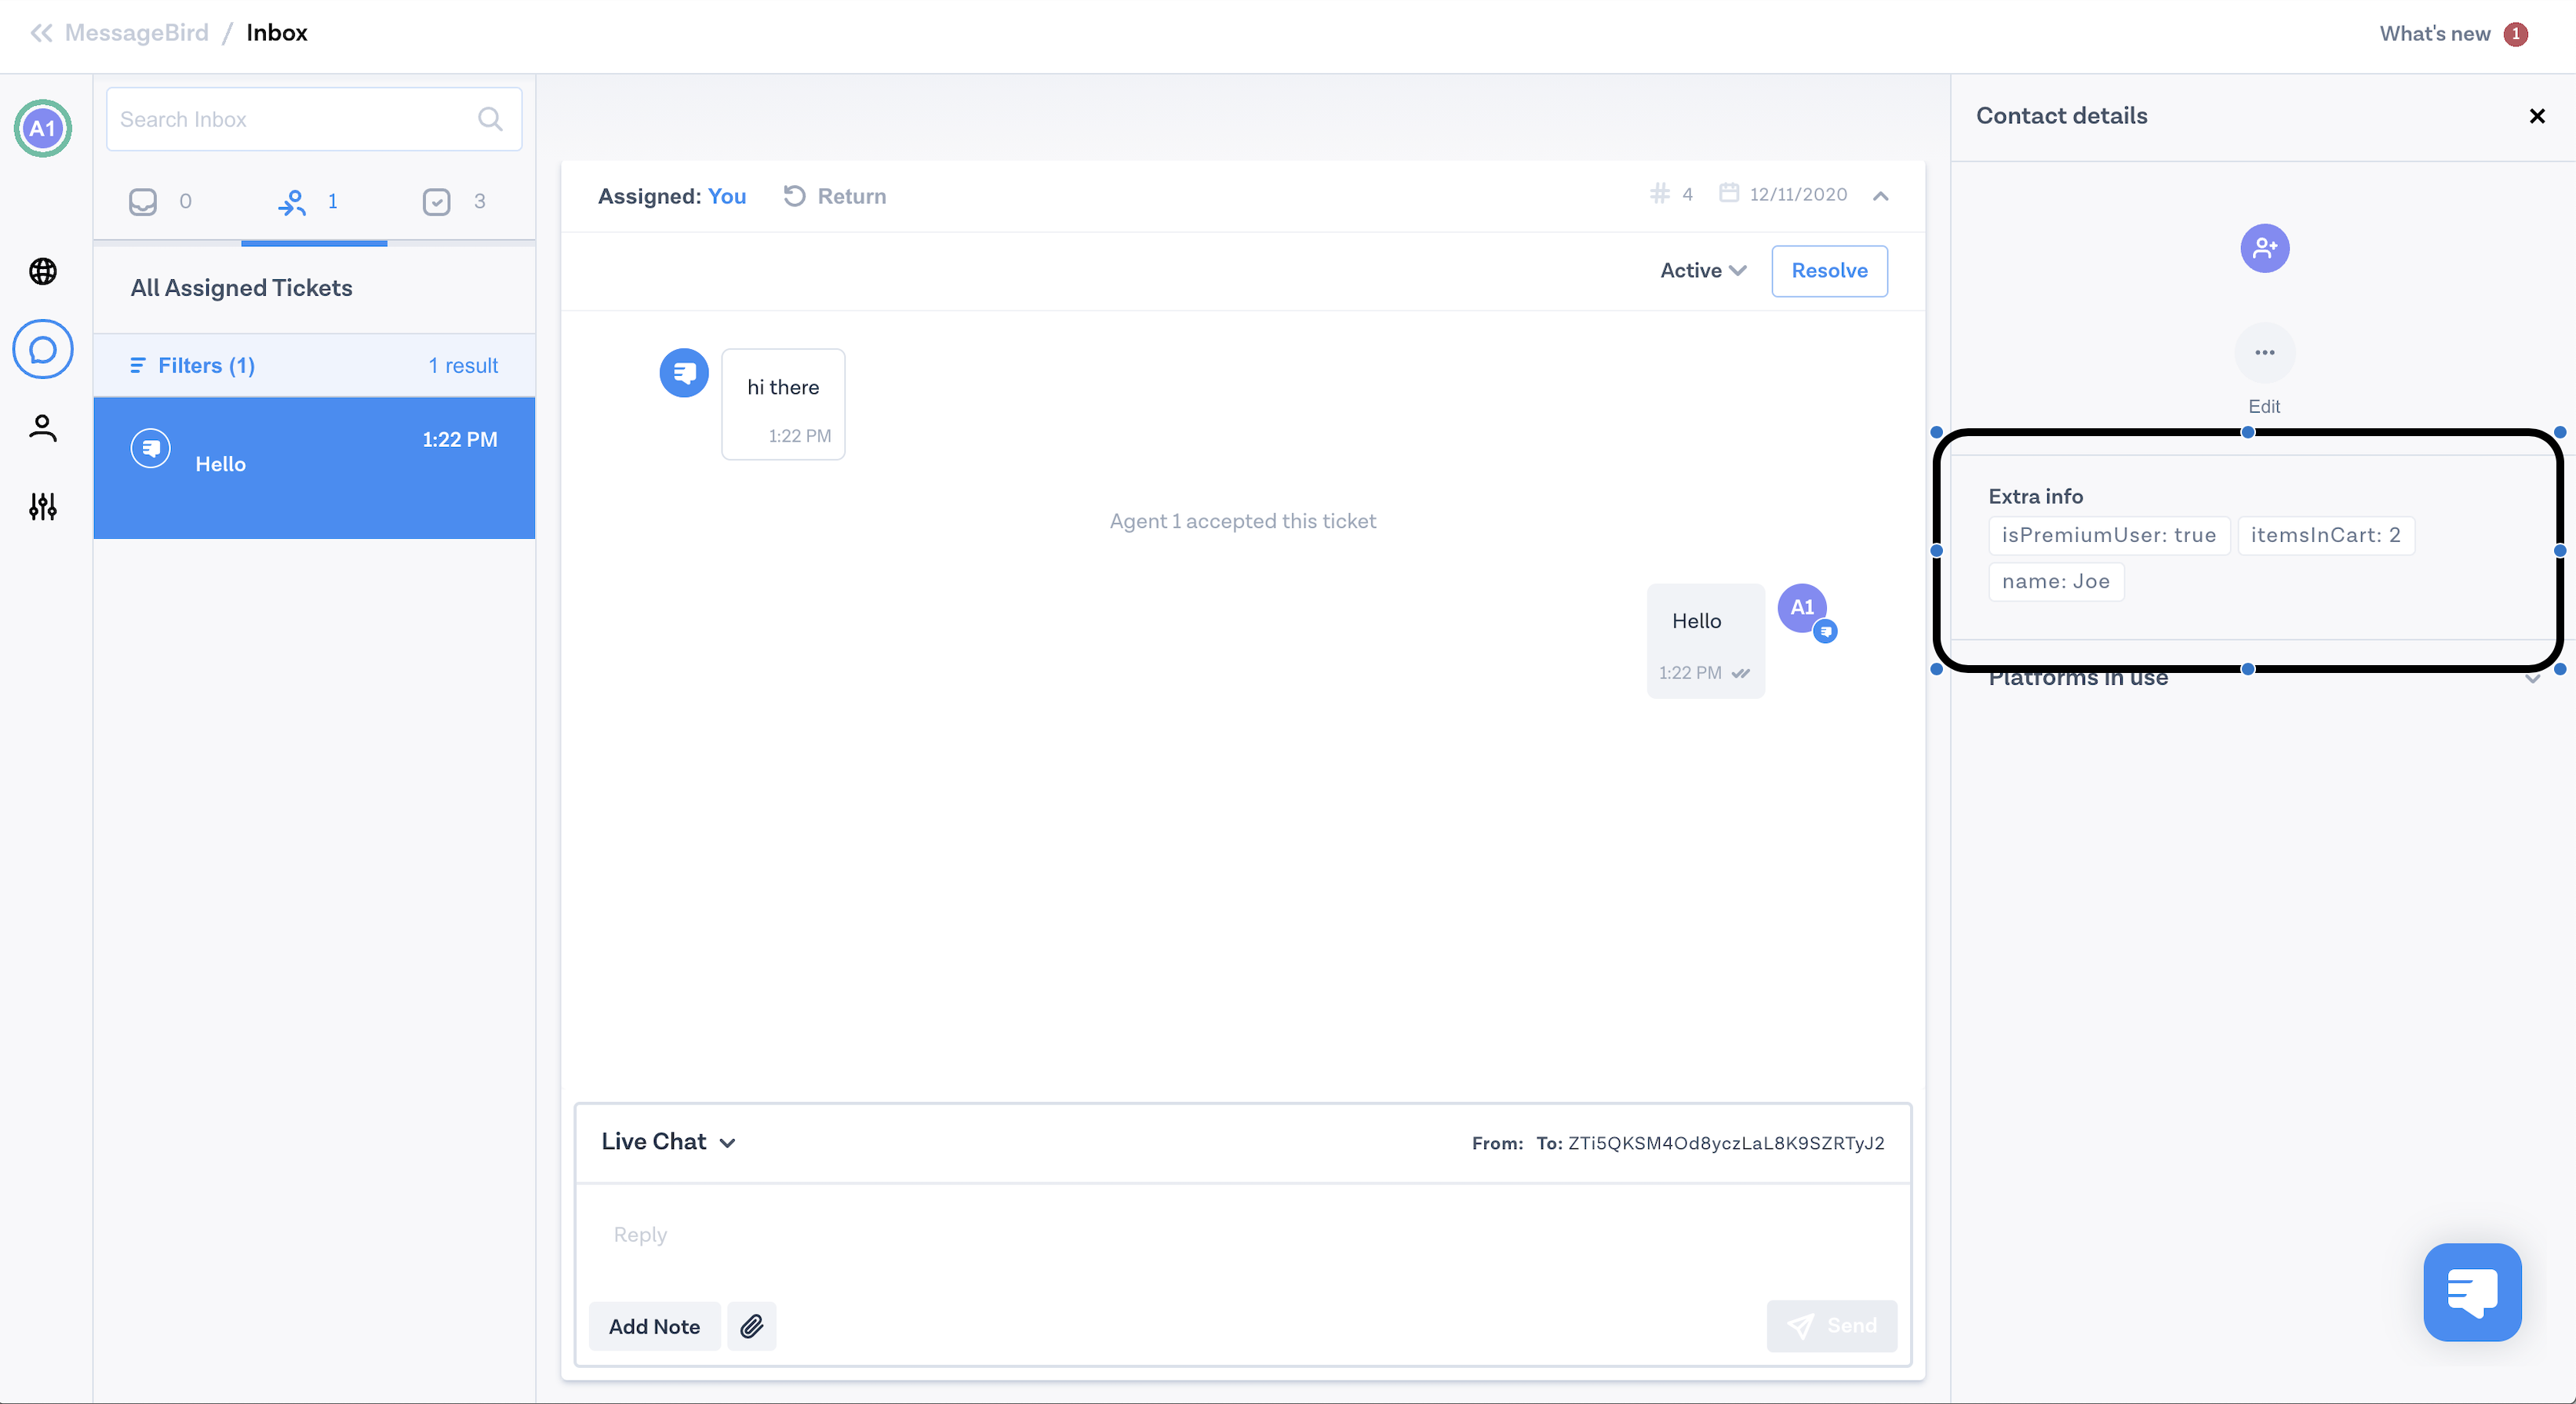
- Send yourself a Live Chat test message and head over to Inbox
- Accept the ticket and check out the Contact Profile tab on the right of your Conversation view. You should see the fields updated correctly!