
Install Channel: WhatsApp
Let's start using the Programmable Conversations API by learning how to install a channel. In this quickstart, you'll learn how to set up WhatsApp Business.
Before we go ahead, have you completed the Getting Started with WhatsApp quickstart?
- No! Make sure to do so before continuing.
- Yes! Great! Go to step 1.
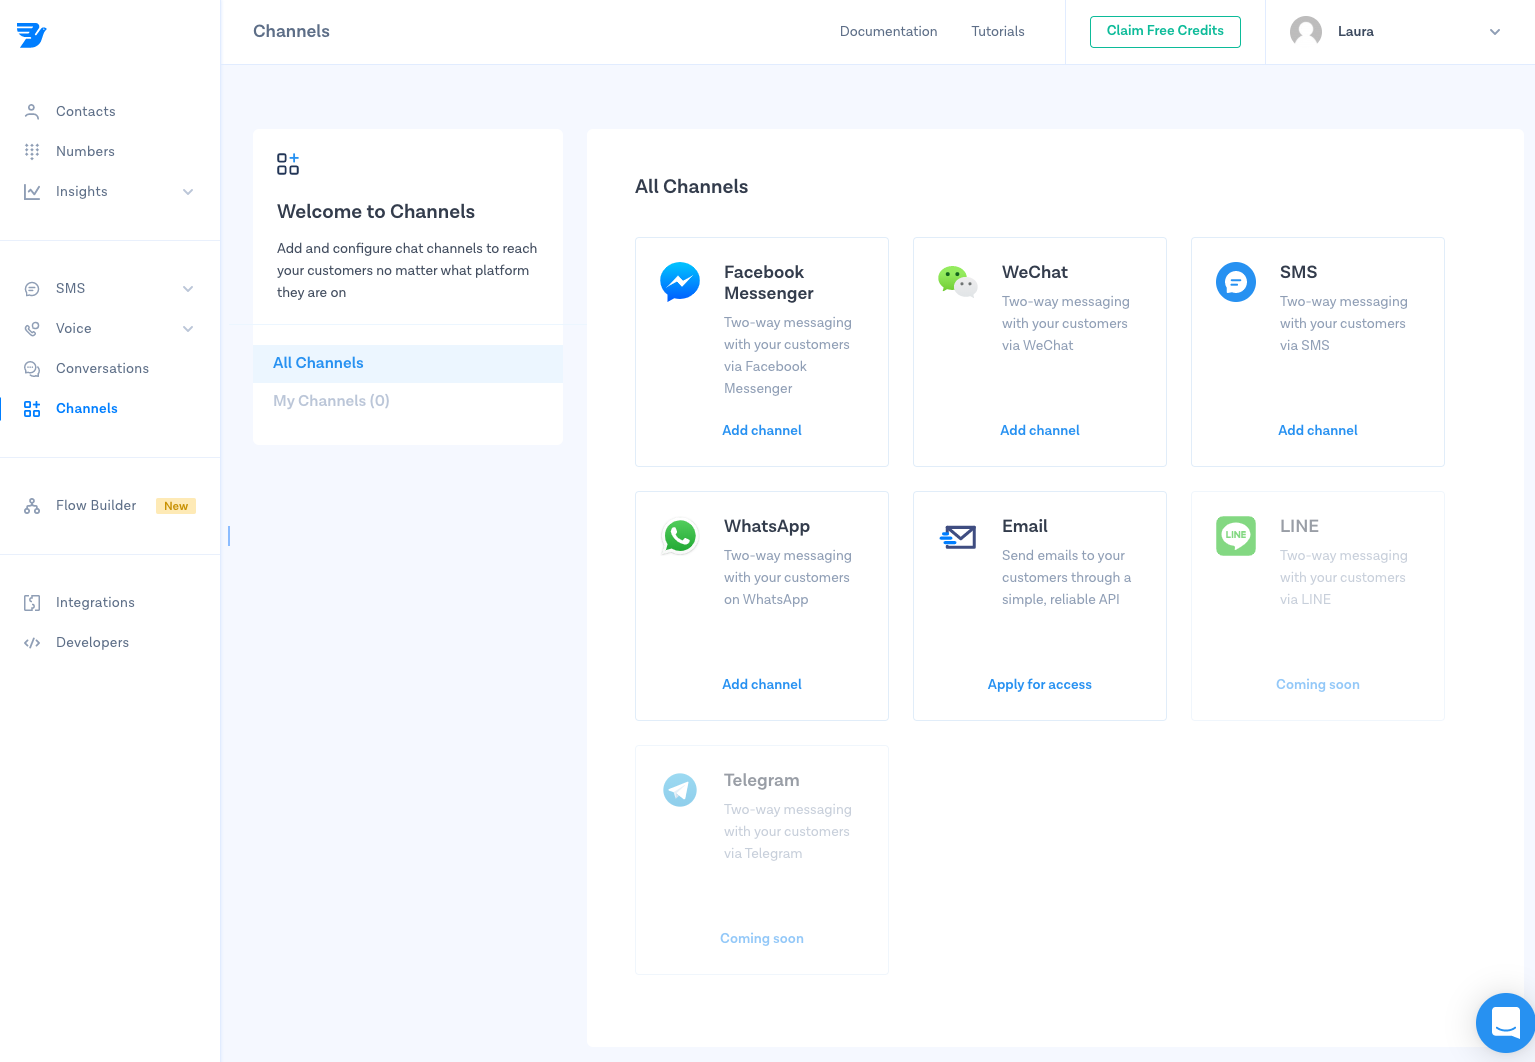
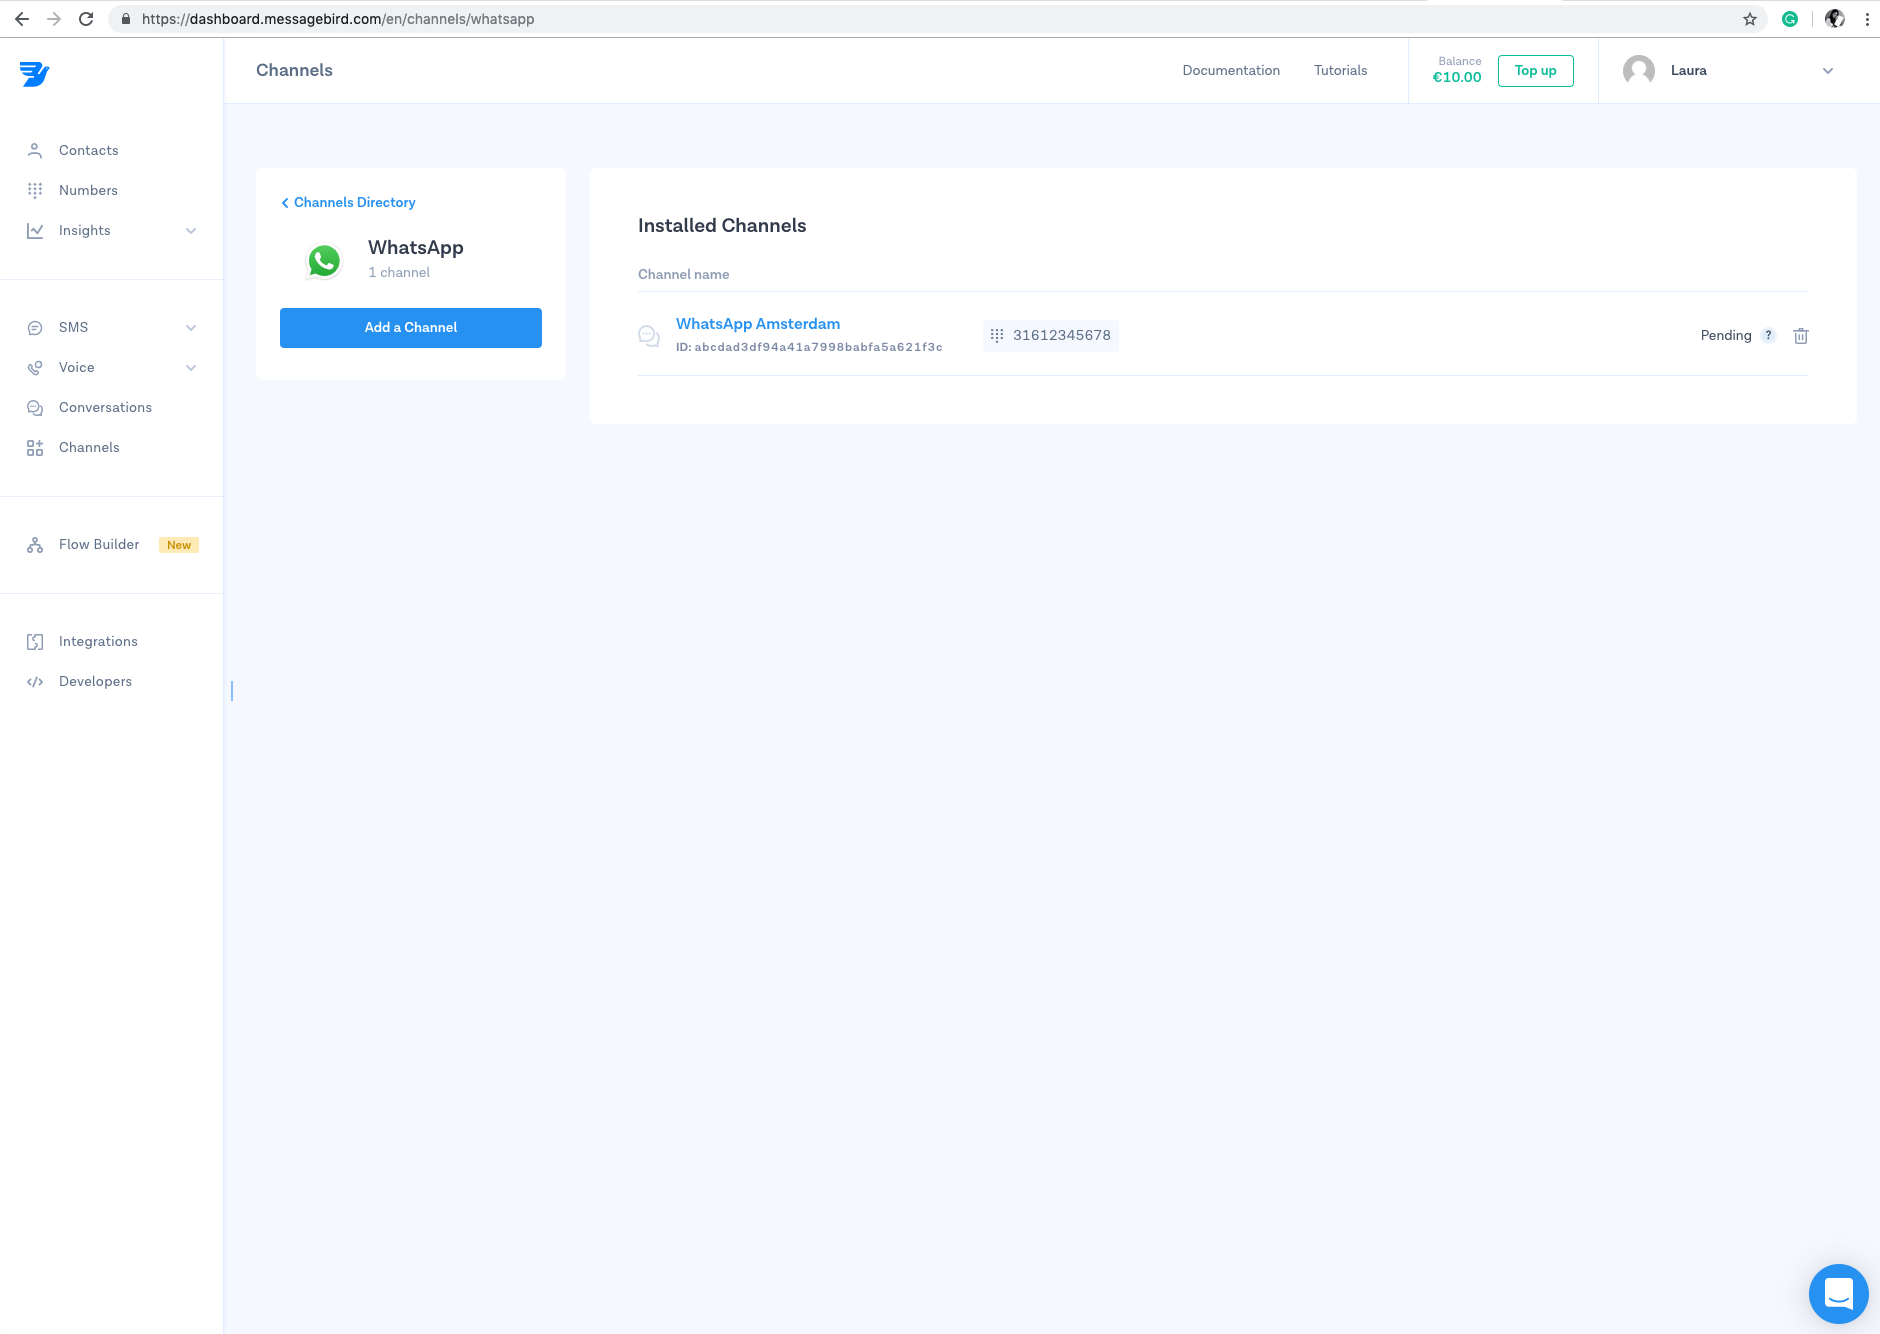
Step 1: Go to the channels directory in your Dashboard
Go to 'Channels' in the sidebar of your MessageBird Dashboard. Then click on Add channel under WhatsApp.
Step 2: Give your channel a name
Name your channel, make sure it's easily recognisable for yourself and your team. Don't worry, this will only be used internally.
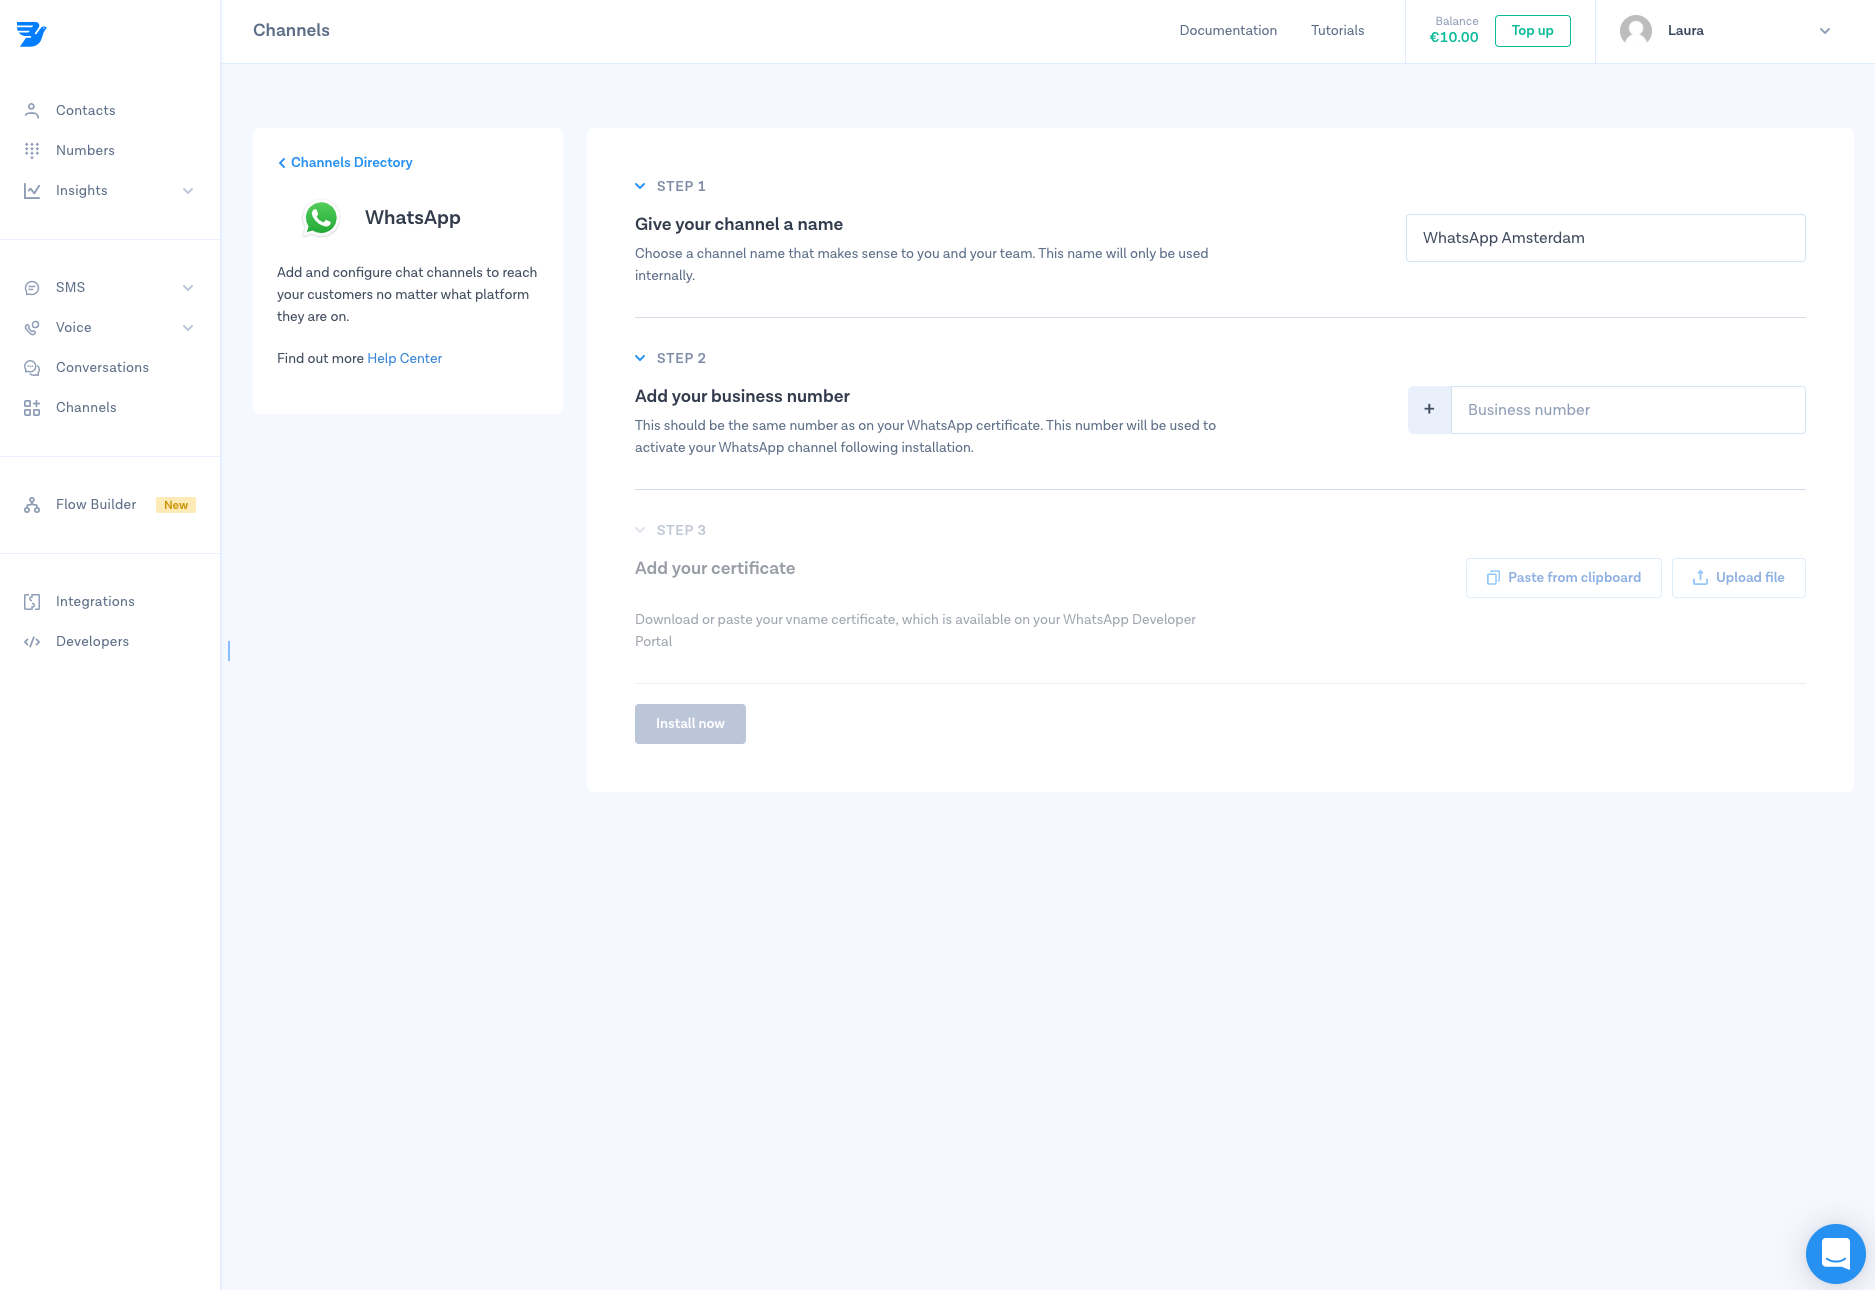
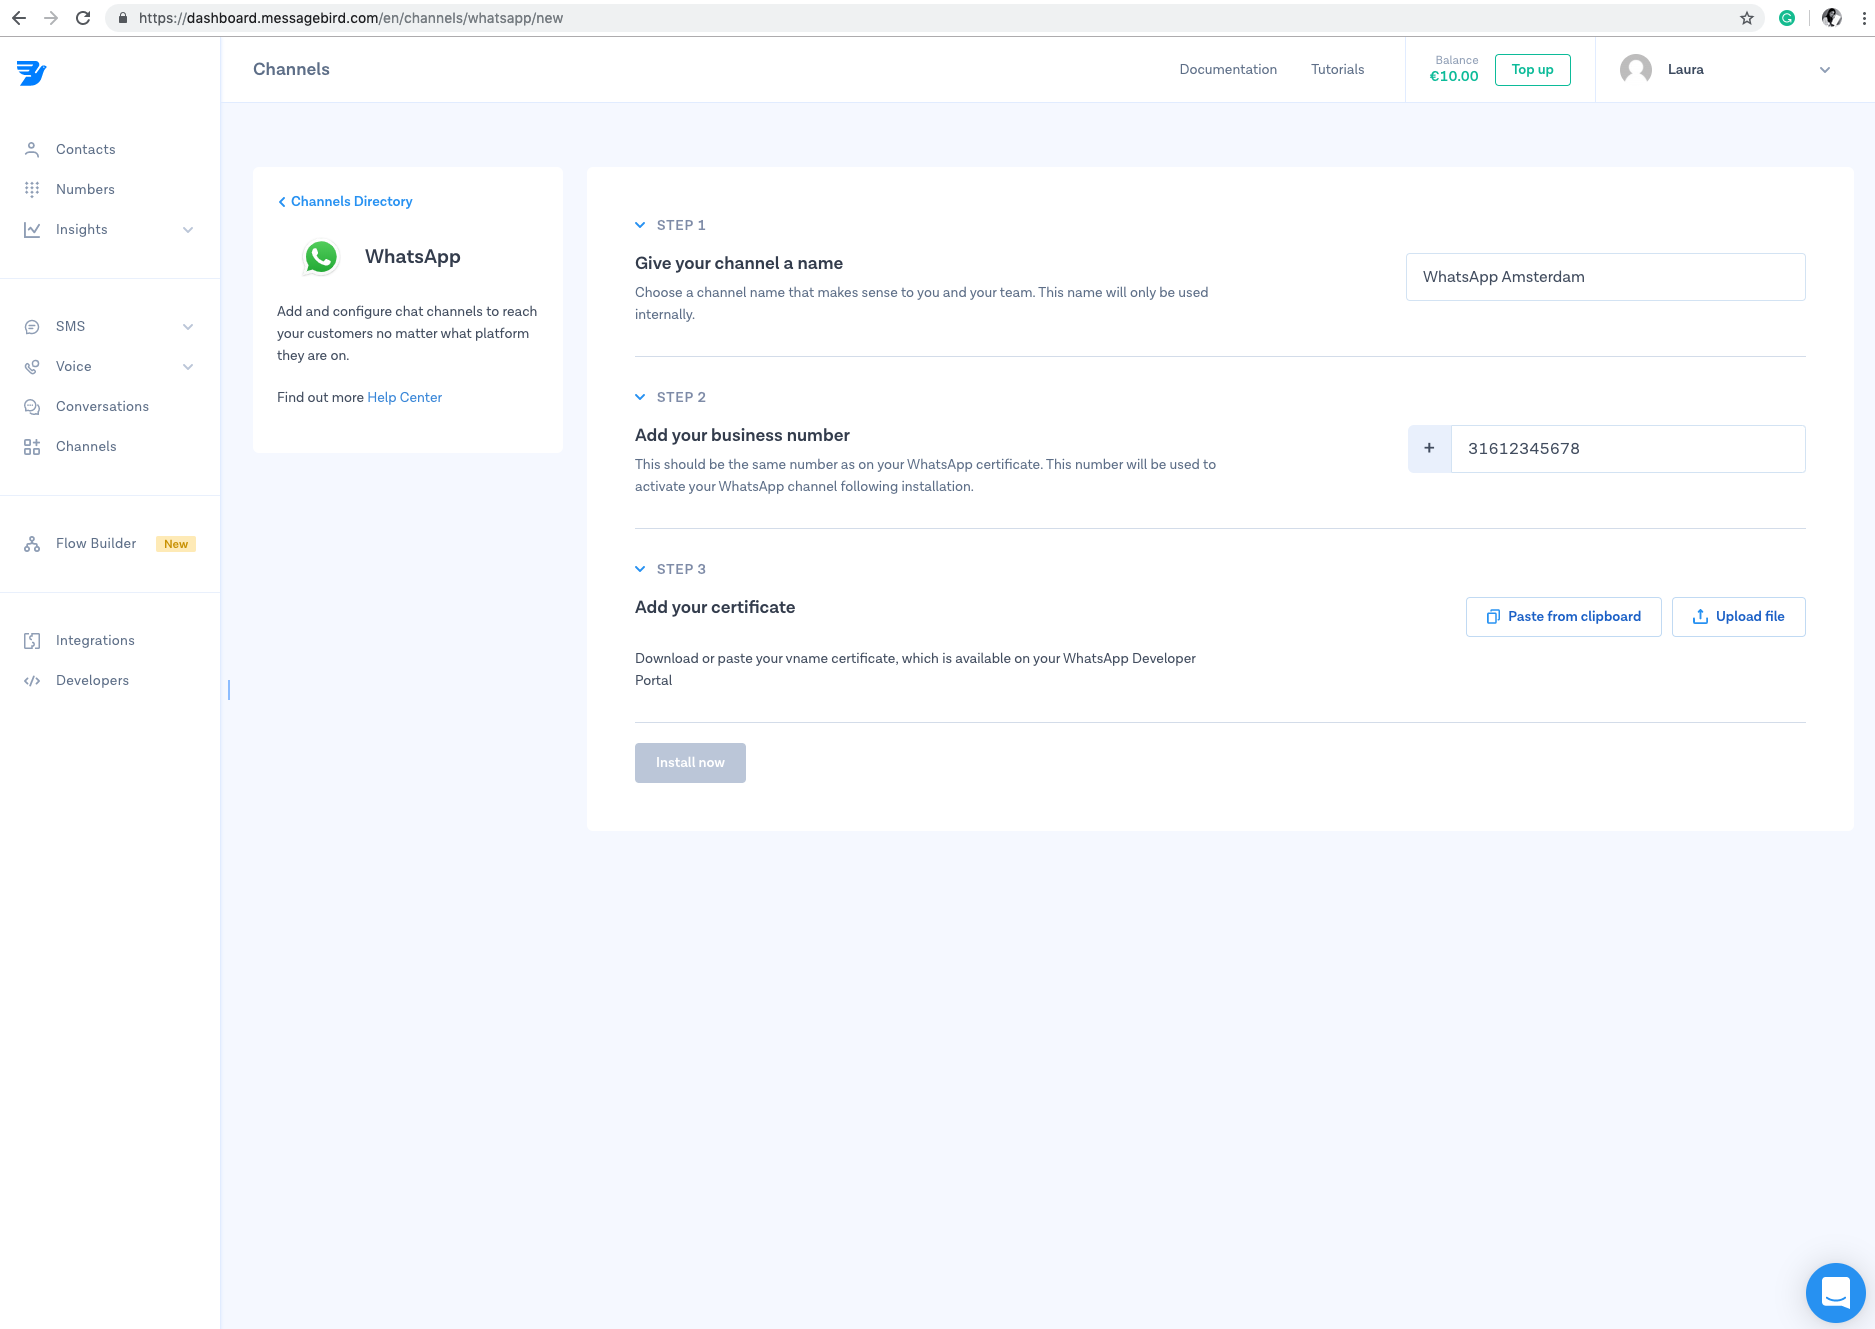
Step 3: Add your WhatsApp number
Add the phone number which you'll be using for WhatsApp. This is the number you chose in step 4 of the Getting Started with WhatsApp quickstart.
Step 4: Add your vname certificate
You're almost there! Paste or download your vname certificate. You received it via email when your number was verified in step 6 of the Getting Started with WhatsApp quickstart.
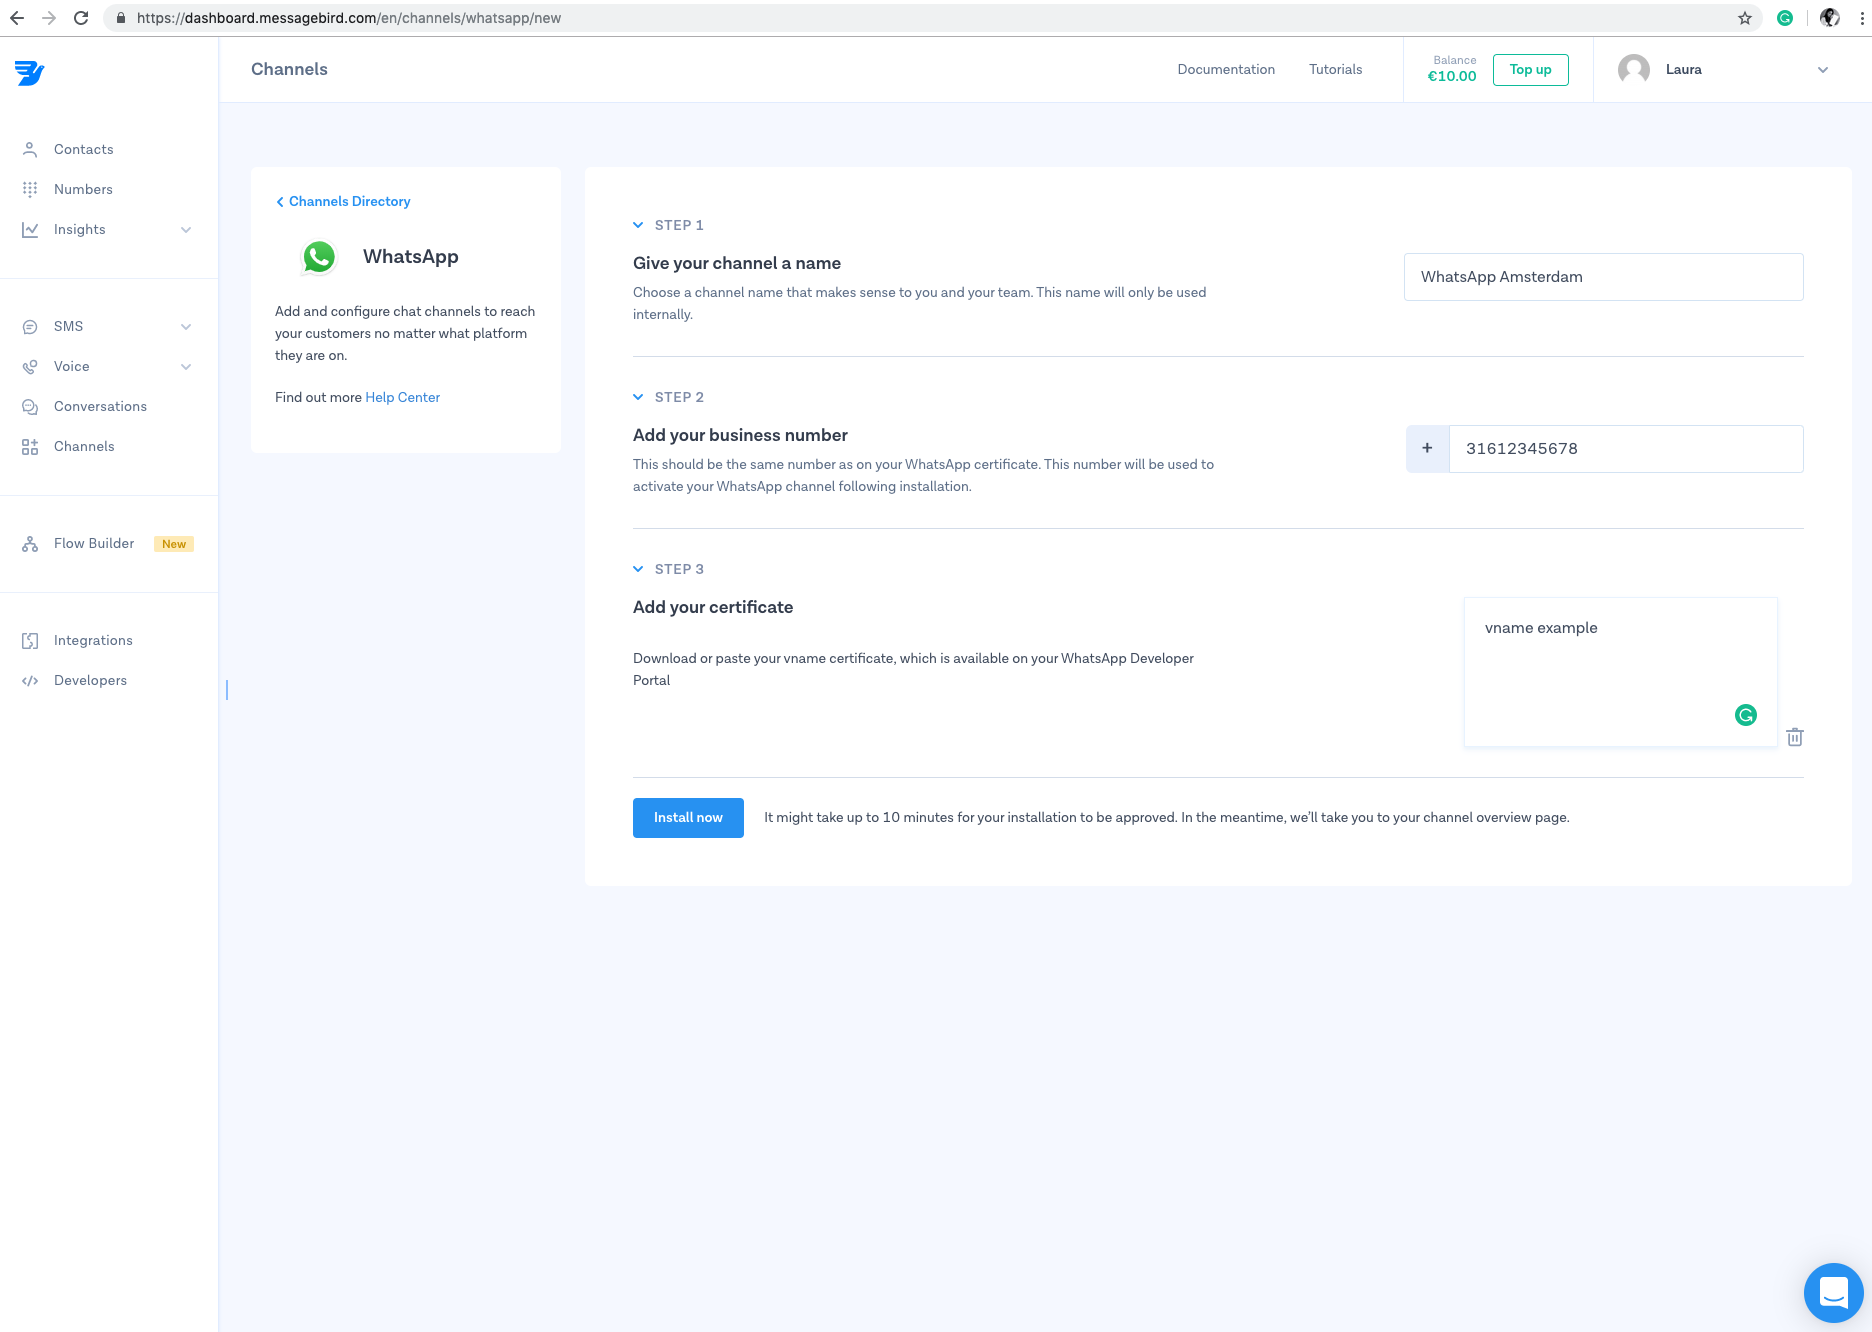
Step 5: Install WhatsApp
Click on 'Install now' and voilà! WhatsApp Business is now installed as a channel.
Keep in mind that it might take up to 10 minutes for your installation to be approved, during those minutes the status will be 'Pending'.
Step 6: Manage your channel
If you want to edit, rename or delete your channel, simply select the channel and save the changes afterwards.
Nice work! 🎉 You've successfully installed WhatsApp Business as a channel for the MessageBird Programmable Conversations API.