
Building an SMS-based customer support system with MessageBird
⏱ 30 min build time || Download the Code
Why build SMS customer support?
In this MessageBird Developer Tutorial, we'll show you how to provide an excellent user experience by managing your inbound support tickets with this real-time SMS communication application between consumers and companies powered by the MessageBird SMS Messaging API.
People love communicating in real time, regardless of whether it’s their friends or to a business. Real time support in a comfortable medium helps to create an excellent support experience that can contribute to retaining users for life.
On the business side, Support teams need to organize communication with their customers, often using ticket systems to combine all messages for specific cases in a shared view for support agents.
We'll walk you through the following steps:
- Customers can send any message to a virtual mobile number (VMN) created and published by the company. Their message becomes a support ticket, and they receive an automated confirmation with a ticket ID for their reference.
- Any subsequent message from the same number is added to the same support ticket; there's no additional confirmation.
- Support agents can view all messages in a web view and reply to them.
Getting started
First things first,, our sample application is built in Node.js using the Express framework, so you’ll need node and npm, you can easily install them for free.
You can download or clone the complete source code from the MessageBird Developer Tutorials GitHub repository to run the application on your computer and follow along with the tutorial.
After saving the code, open a console for the download directory and run the following command which downloads the Express framework, MessageBird SDK and other dependencies defined in the package.json file:
npm install
We use mongo-mock to provide an in-memory database for testing, so you don't need to configure an external database. If you want to extend the sample into a production application, you can replace mongo-mock with real MongoDB.
Prerequisites for receiving messages
Overview
The support system receives incoming messages. From a high-level viewpoint, receiving is relatively simple: an application defines a webhook URL, which you assign to a number purchased in the MessageBird Dashboard using Flow Builder. A webhook is a URL on your site that doesn't render a page to users but is like an API endpoint that can be triggered by other servers. Every time someone sends a message to that number, MessageBird collects it and forwards it to the webhook URL where you can process it.
Exposing your development server with ngrok
When working with webhooks, an external service like MessageBird needs to access your application, so the webhook URL must be public; however, during development you're typically working in a local development environment that is not publicly available. Thankfully this is not a big deal since various tools and services allow you to quickly expose your development environment to the Internet by providing a tunnel from a public URL to your local machine. One of these tools is localtunnel.me, which is uniquely suited to NodeJS developers since you can easily install it using npm:
npm install -g localtunnel
You can start a tunnel by providing a local port number on which your application runs. Our application is configured to run on port 8080, so you can launch a tunnel with the following command:
lt --port 8080
After you've started the tunnel, localtunnel displays your temporary public URL. We'll need that in a minute.
Another common tool for tunneling your local machine is ngrok, which works virtually in the same way; you can have a look at it if you're facing problems with with localtunnel.me.
Getting an Inbound Number
A requirement for receiving messages is a dedicated inbound number. Virtual mobile numbers look and work in a similar way to regular mobile numbers, however, instead of being attached to a mobile device via a SIM card, they live in the cloud and can process inbound SMS and voice calls. MessageBird offers numbers from different countries for a low monthly fee; feel free to explore our low-cost programmable and configurable numbers.
Purchasing a number is quite easy:
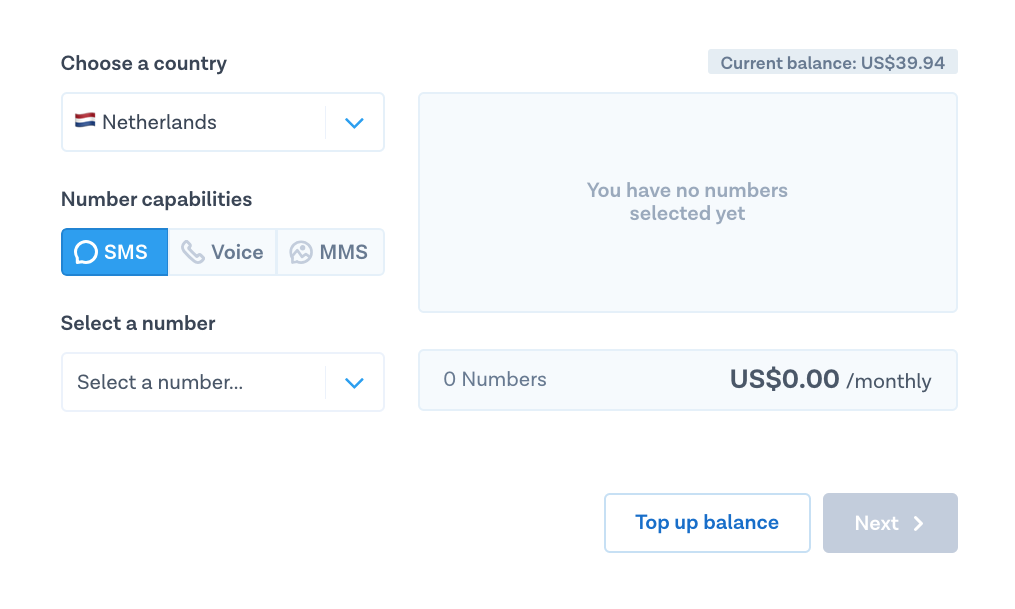
Go to the ‘Numbers’ section in the left-hand side of your Dashboard and click the blue button ‘Buy a number’ in the top-right side of your screen.
Pick the country in which you and your customers are located, and make sure the SMS capability is selected.
Choose one number from the selection and the duration for which you want to pay now.
Confirm by clicking ‘Buy Number’ in the bottom-right of your screen..
Awesome, you’ve set up your first virtual mobile number! 🎉
Pro-tip: Check out our Help Center for more information about virtual mobile numbers and country restrictions.
Connect your number to the webhook
So you have a number now, but MessageBird has no idea what to do with it. That's why now you need to define a Flow that links your number to your webhook. This is how you do it:
STEP ONE
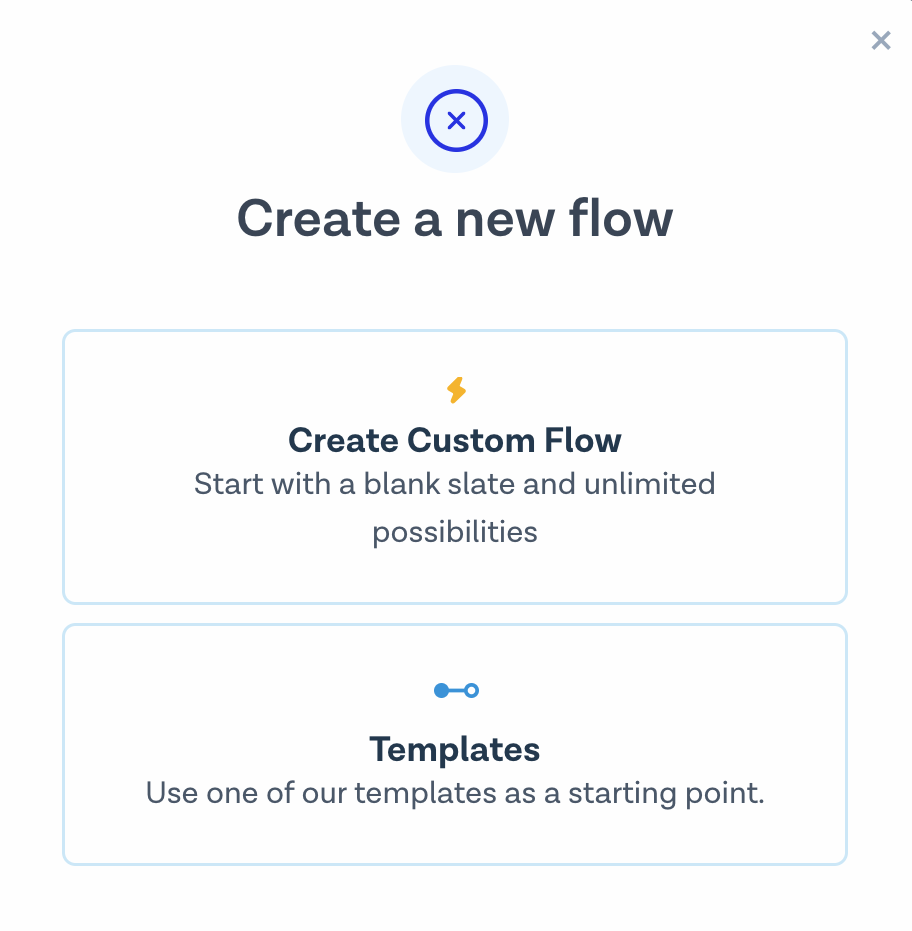
Go to Flow Builder, choose the template ‘Call HTTP endpoint with SMS’ and click ‘Try this flow’.
STEP TWO
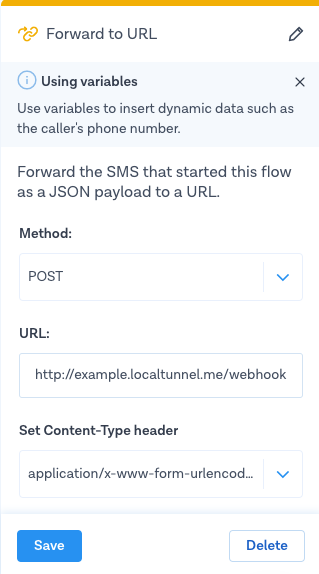
This template has two steps. Click on the first step ‘SMS’ and select the number or numbers you’d like to attach the flow to. Now, click on the second step ‘Forward to URL’ and choose POST as the method; copy the output from the lt command in the URL and add /webhook at the end—this is the name of the route we use to handle incoming messages in our sample application. Click on ‘Save’ when ready.
STEP THREE
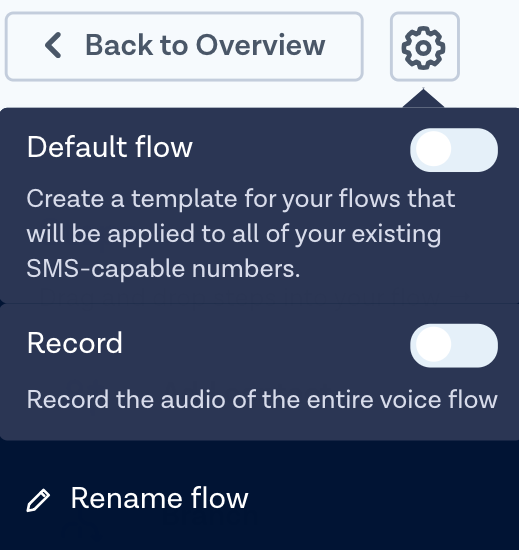
Ready! Hit ‘Publish’ on the right top of the screen to activate your flow. Well done, another step closer to testing incoming messages! Your flow should look something like this:
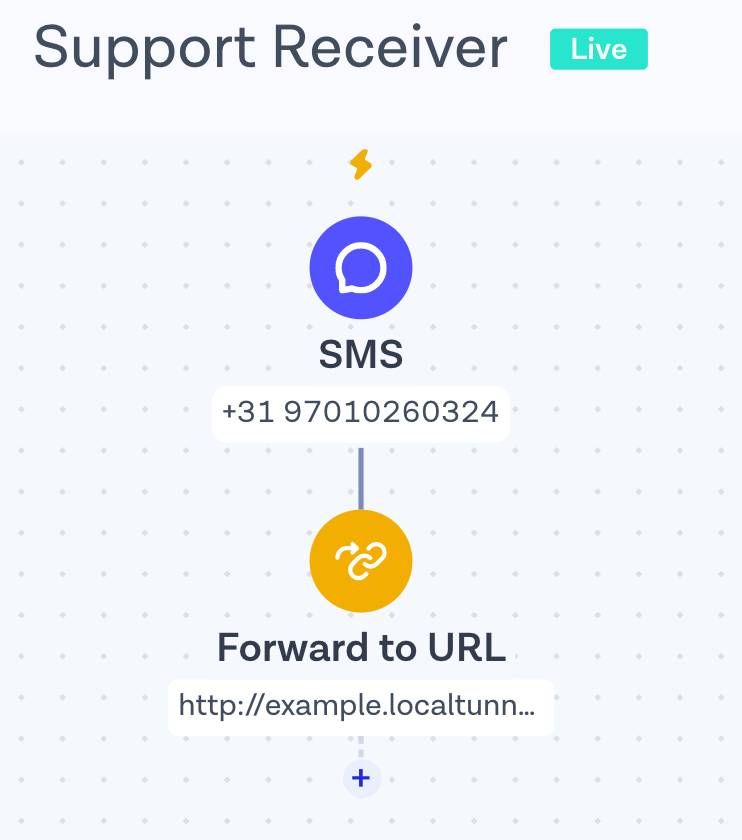
Pro-tip: It might be useful to rename it this flow, because Untitled flow won't be helpful in the long run. You can do this by clicking on the icon next to button ‘Back to Overview’ and pressing ‘Rename flow’.
Configuring the MessageBird SDK
The MessageBird SDK and an API key are not required to receive messages; however, since we want to send replies, we need to add and configure it. The SDK is defined in package.json and loaded with a statement in index.js:
// Load and initialize MessageBird SDKvar messagebird = require('messagebird')(process.env.MESSAGEBIRD_API_KEY);
You need to provide a MessageBird API key, as well as the phone number you registered so that you can use it as the originator, via environment variables loaded with dotenv. We've prepared an env.example file in the repository, which you should rename to .env and add the required information. Here's an example:
MESSAGEBIRD_API_KEY=YOUR-API-KEYMESSAGEBIRD_ORIGINATOR=+31970XXXXXXX
Let's create your live API access key. First, go to the MessageBird Dashboard; if you have already created an API key it will be shown right there. If you don’t see any key on the Dashboard or if you're unsure whether this key is in live mode, go to the Developers section in the MessageBird Dashboard and open the API access (REST) tab. There you can create new API keys and manage your existing ones.
If you are having any issues creating your API key, please reach out to support@messagebird.com; we’ll make sure to help you out.
Receiving messages
Now we're fully prepared for receiving inbound messages, so let’s implement the app.post('/webhook') route:
// Handle incoming webhooksapp.post('/webhook', function(req, res) {// Read input sent from MessageBirdvar number = req.body.originator;var text = req.body.payload;
The webhook receives multiple request parameters from MessageBird; however, we're interested in two of them: the originator which is the number of the user who sent the message (it’s important don't confuse it with the originator you configured which is for outgoing messages), and the payload, which is the content of the text message.
MongoClient.connect(dbUrl, {}, function(err, db) {// Find ticket for number in our databasevar tickets = db.collection('tickets');tickets.findOne({ number : number }, function(err, doc) {
The number is used to look up the ticket; if none exists, we create a new ticket and add one inbound message to it:
if (doc == null) {// Creating a new tickettickets.insertOne({number : number,open : true,messages : [{direction : 'in',content : text}]}, function(err, result) {console.log("created ticket", err, result);
As you can see, we store the whole message history in a single Mongo document using an array called messages. In the callback for the Mongo insert function we send the ticket confirmation to the user:
// After creating a new ticket, send a confirmationvar idShort = result.insertedId.str.substring(18, 24);messagebird.messages.create({originator : process.env.MESSAGEBIRD_ORIGINATOR,recipients : [ number ],body : "Thanks for contacting customer support! Your ticket ID is " + idShort + "."}, function(err, response) {console.log(err, response);});});
Let's unpack this. First, we take an excerpt of the autogenerated MongoDB ID because the full ID is too long and the last 6 digits are unique enough for our purpose. Then, we call messagebird.messages.create() to send a confirmation message. Three parameters are passed to the API:
- Our configured originator, so that the receiver sees a reply from the number which they contacted in the first place.
- A recipient array with the number from the incoming message so that the reply goes back to the right person.
- The body of the message, which contains the ticket ID.
So, what if a ticket already exists? In this case, our else block, we'll add a new message to the array and store the updated document; there’s no need to send another confirmation.
} else {// Add an inbound message to the existing ticketdoc.messages.push({direction : 'in',content : text});tickets.updateOne({number : number}, {$set: {open : true,messages : doc.messages}}, function(err, result) {console.log("updated ticket", err, result);});}
Servers sending webhooks typically expect you to return a response with a default 200 status code to indicate that their webhook request was received, but they don’t parse the response. Therefore, we send the string OK at the end of the route handler, regardless of the case that we handled.
// Return any response, MessageBird won't parse thisres.send('OK');
Reading messages
Customer support team members can view incoming tickets from an admin view. We have implemented a simple admin view in the app.get('/admin') route. The approach is straightforward: request all documents representing open tickets from MongoDB, convert IDs as explained above and then pass them to a Handlebars template.
The template is stored in views/admin.handlebars. Apart from the HTML that renders the documents, there’s a small Javascript section in it that refreshes the page every 10 seconds; thanks to this, you can keep the page open and will receive messages automatically with only a small delay and without the implementation of Websockets.
This is the implementation of the route:
// Show tickets for customer support adminapp.get('/admin', function(req, res) {MongoClient.connect(dbUrl, {}, function(err, db) {// Find all open ticketsvar tickets = db.collection('tickets');tickets.find({ open: true }, {}).toArray(function(err, docs) {// Shorten IDfor (d in docs) {docs[d].shortId = docs[d]._id.str.substring(18, 24);}// Show a page with ticketsres.render('admin', {tickets: docs,});});});});
Replying to messages
The admin template also contains a form for each ticket through which you can send replies. The implementation uses messagebird.messages.create() analogous to the confirmation messages we're sending for new tickets. If you're curious about the details, you can look at theapp.post('/reply')implementation route inindex.js.
Testing
You’re done! It’s time to test your application.
Double-check that you’ve set up your number correctly with a flow that forwards incoming messages to a localtunnel URL and that the tunnel is still running. Keep in mind that whenever you start a fresh tunnel with the lt command, you'll get a new URL, so you have to update it in the flow accordingly.
To start the application you have to enter another command, but your existing console window is already busy running your tunnel. Therefore you need to open another one. With Mac you can press Command + Tab to open a second tab that's already pointed to the correct directory. With other operating systems you may have to open another console window manually. Either way, once you've got a command prompt, type the following to start the application:
node index.js
Open http://localhost:8080/admin in your browser. You should see an empty list of tickets. Then, take out your phone, launch the SMS app, and send a message to your virtual mobile number. Around 10-20 seconds later, you should see your message in the browser. Amazing! Try again with another message which will be added to the ticket, or send a reply.
Use the flow, code snippets, and UI examples from this tutorial as an inspiration to build your own SMS Customer Support system. Don't forget to download the code from the MessageBird Developer Tutorials GitHub repository.
Nice work! 🎉
You now have a running SMS Customer Support application using Node.js!
Start building!
Want to build something similar but not quite sure how to get started? Feel free to let us know at support@messagebird.com; we'd love to help!