
Setting masked phone numbers with MessageBird
⏱ 30 min build time || Download the Code
Why build a number masking application?
In this MessageBird Developer Tutorial, you’ll learn how to anonymize and protect your users’ personal information by building a basic masked numbers application powered by the MessageBird API.
Online service platforms—such as ride-sharing, online food delivery, and logistics—facilitate the experience between customers and providers by matching both sides of the transaction to ensure everything runs smoothly and the transaction is completed.
Sometimes it’s necessary for customers and providers to talk or message each other directly; a problem arises since, for many reasons, both parties may not feel comfortable sharing their personal phone number. A great solution to this issue is using anonymous proxy phone numbers that mask a user's personal phone number while also protect the platform's personal contact details. The result: a customer doesn't see their provider's phone number but a number that belongs to the platform and forwards their call to the provider, and vice versa for providers.
Along this tutorial, we'll show you how to build a proxy system to mask phone numbers in PHP for our fictitious ride-sharing platform, BirdCar. The sample application includes a data model for customers, drivers, rides, and proxy phone numbers and allows setting up new rides from an admin interface for demonstration purposes.
Using a number pool
Before we dive into building the sample application, let's take a moment to understand the concept of a number pool. The idea is to set up a list of numbers by purchasing one or more virtual mobile numbers from MessageBird and adding them to a database. Whenever a ride is created, the BirdCar application will automatically search the pool for a driver that is available and then assign the ride.
For simplicity and to allow testing with a single number, BirdCar assigns only one number to each ride, not one for each party. If the customer calls or texts this number, is connected to the driver; if the driver rings, the call or text is forwarded to the customer. The incoming caller or message sender identification sent from the network is used to determine which party calls and consequently find the other party's number. Relying on the caller identification has the additional advantage that you don’t have to purchase a new phone number for each transaction; instead, it is possible to assign the same one to multiple transactions as long as different people are involved. The ride can be looked up based on who is calling. It is also possible to recycle numbers even for the same customer or driver, that is, returning them to the pool, although we haven’t implemented this behavior in the sample code. In any case, the number should remain active for some time after a transaction has ended, just in case the driver and customer need to communicate afterwards; for example, if the customer has forgotten an item in the driver’s car. 😱
Getting started
First things first, our sample application is built in PHP with the Slim framework and uses a relational database to store the data model, so if you're using a Mac, PHP is already installed; for Windows, you can get it from windows.php.net; for Linux users, please check your system's default package manager.
You also need Composer, which is available from getcomposer.org, to install application dependencies.
The source code is available in the MessageBird Developer Tutorials GitHub repository, which you can either clone with git or from where you can download a ZIP file with the source code to your computer.
To install the MessageBird SDK for PHP, and the framework, open a console pointed at the directory into which you've stored the sample application and run the following command:
composer install
Prerequisites for receiving messages and calls
Overview
The BirdCar system receives incoming messages and calls and forwards them. From a high-level viewpoint, receiving is relatively simple: an application defines a webhook URL, which you assign to a number purchased in the MessageBird Dashboard using Flow Builder. A webhook is a URL on your site that doesn't render a page to users but is like an API endpoint that can be triggered by other servers. Every time someone sends a message or calls that number, MessageBird collects it and forwards it to the webhook URL where you can process it.
Exposing your development server with ngrok
When working with webhooks, an external service like MessageBird needs to access your application, so the URL must be public; however, during development you're typically working in a local development environment that is not publicly available. Thankfully this is not a big deal since various tools and services allow you to quickly expose your development environment to the Internet by providing a tunnel from a public URL to your local machine. One of the most popular tools is ngrok.
You can download ngrok for free as a single-file binary for almost every operating system, or optionally sign up for an account to access additional features.
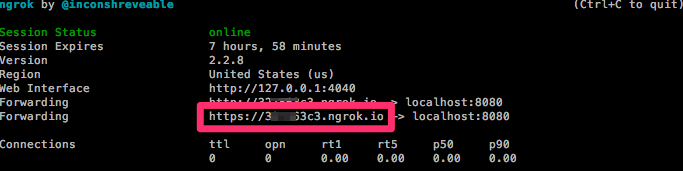
Let’s start a tunnel by providing a local port number on which your application runs. We’ll run our PHP server on port 8080, so you can launch your tunnel with this command:
ngrok http 8080
After you've launched the tunnel, ngrok displays your temporary public URL along with some other information. We'll need that URL in a minute.
Another common tool for tunneling your local machine is localtunnel.me, which works virtually in the same way; you can have a look at it if you're facing problems with with ngrok. Keep in mind that it requires you to install NPM first.
Getting an inbound number
A requirement for receiving messages is a dedicated inbound number. Virtual mobile numbers (VNM) look and work similar to regular mobile numbers; however, instead of being attached to a mobile device via a SIM card, they live in the cloud and can process inbound SMS and voice calls. MessageBird offers numbers from different countries for a low monthly fee; feel free to explore our low-cost programmable and configurable numbers.
Purchasing a number is quite easy:
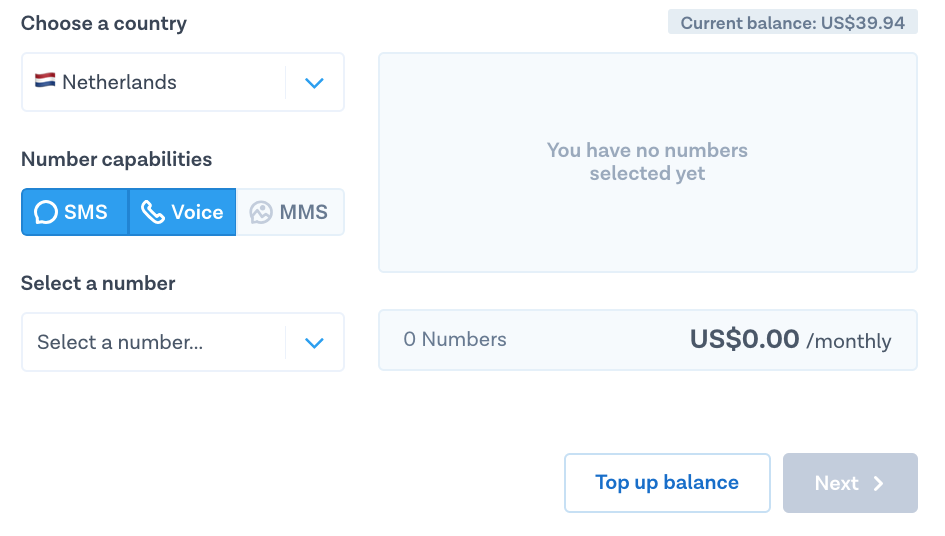
Go to the ‘Numbers’ section in the left-hand side of your Dashboard and click the blue button ‘Buy a number’ in the top-right side of your screen.
Pick the country in which you and your customers are located, and make sure both the SMS and Voice capabilities are selected.
Choose one number from the selection and the duration for which you want to pay now.
Confirm by clicking ‘Buy Number’ in the bottom-right of your screen.
Awesome, you’ve set up your first virtual mobile number! 🎉
One is enough for testing, but for real usage of the masked number system, you'll need a larger pool of numbers; simply follow the same steps listed to purchase more.
Pro-tip: Check out our Help Center for more information about virtual mobile numbers and country restrictions.
Connecting the number to a webhook for SMS
So you have a number now, but MessageBird has no idea what to do with it. That's why now you need to define a Flow that links your number to your webhook. We’ll start with the flow for inbound SMS messages:
STEP ONE
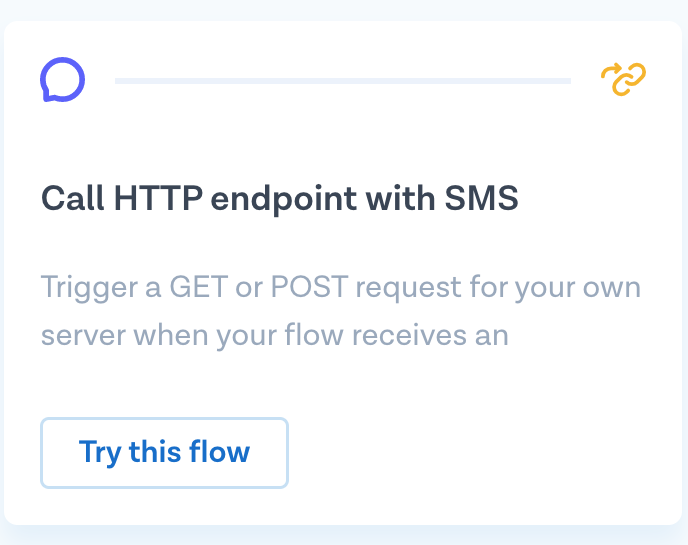
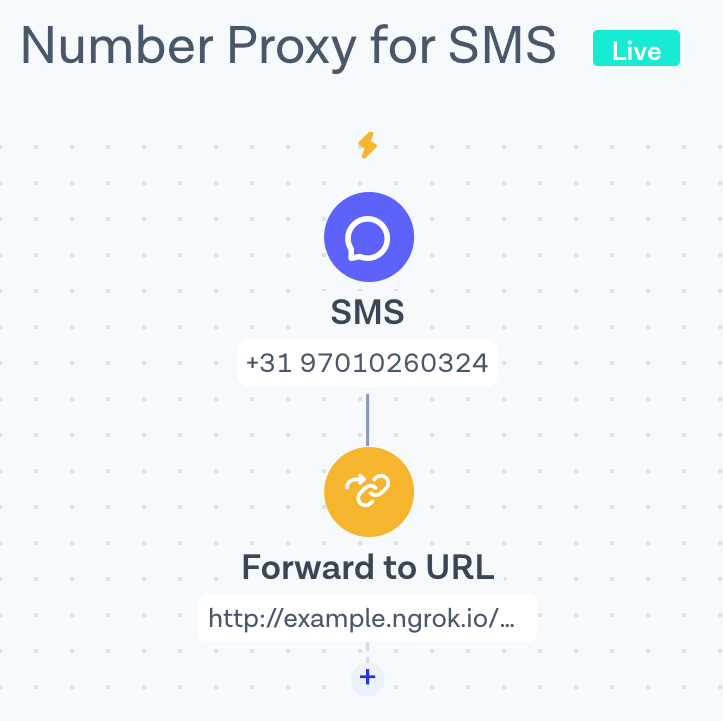
Go to Flow Builder, choose the template ‘Call HTTP endpoint with SMS’, and click ‘Try this flow’.
STEP TWO
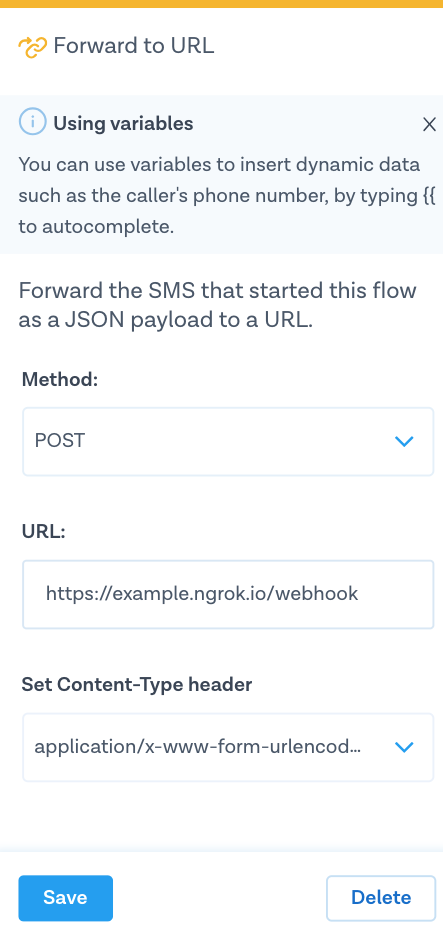
This template has two steps. Click on the first step ‘SMS’ and select the number or numbers you’d like to attach the flow to. Now, click on the second step ‘Forward to URL’ and choose POST as the method; copy the output from the ngrok command in the URL and add /webhook at the end—this is the name of the route we use to handle incoming messages in our sample application. Click on ‘Save’ when ready.
STEP THREE
Ready! Hit ‘Publish’ on the right top of the screen to activate your flow. Well done, another step closer to testing incoming messages! Your flow should look something like this:
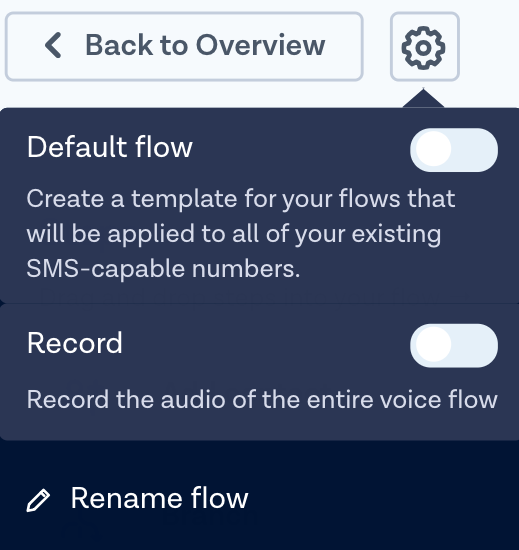
Pro-tip: It might be useful to rename it this flow, because Untitled flow won't be helpful in the long run. You can do this by clicking on the icon next to button ‘Back to Overview’ and pressing ‘Rename flow’.
Awesome! 🎉
Connecting the number to a webhook for voice
Let’s set up a second flow for incoming voice calls:
STEP ONE
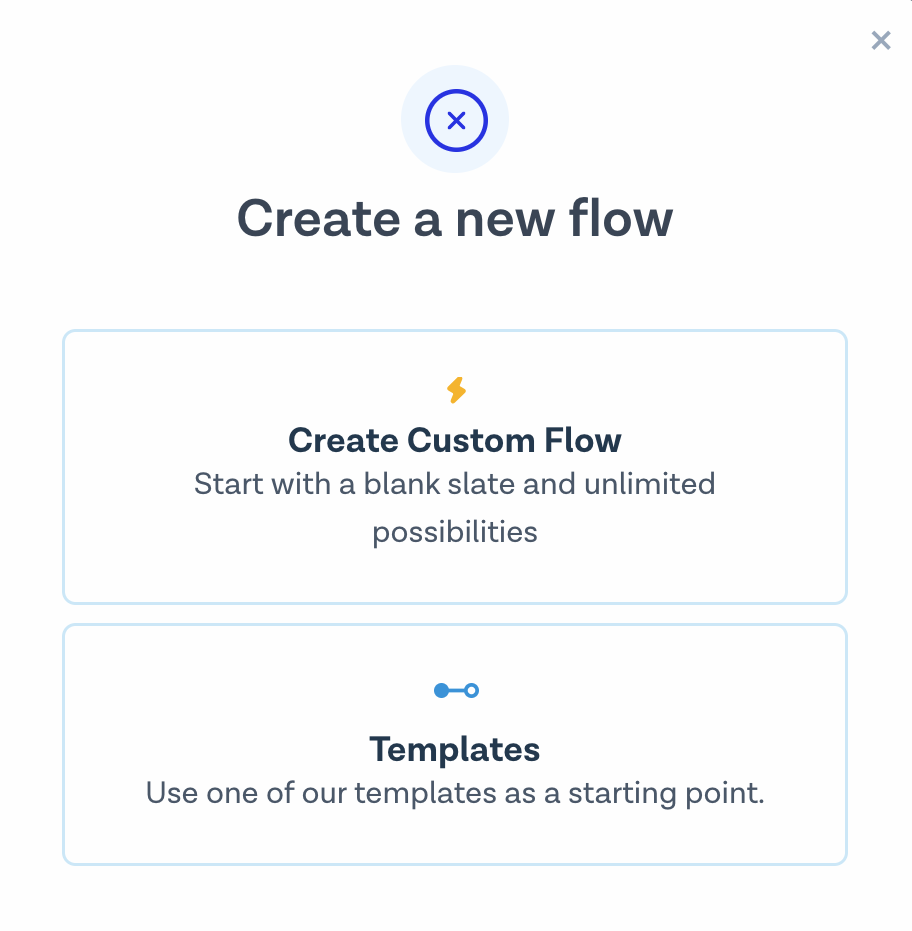
Go back to Flow Builder and hit the button ‘Create new flow’ and then ‘Create Custom Flow’.
STEP TWO
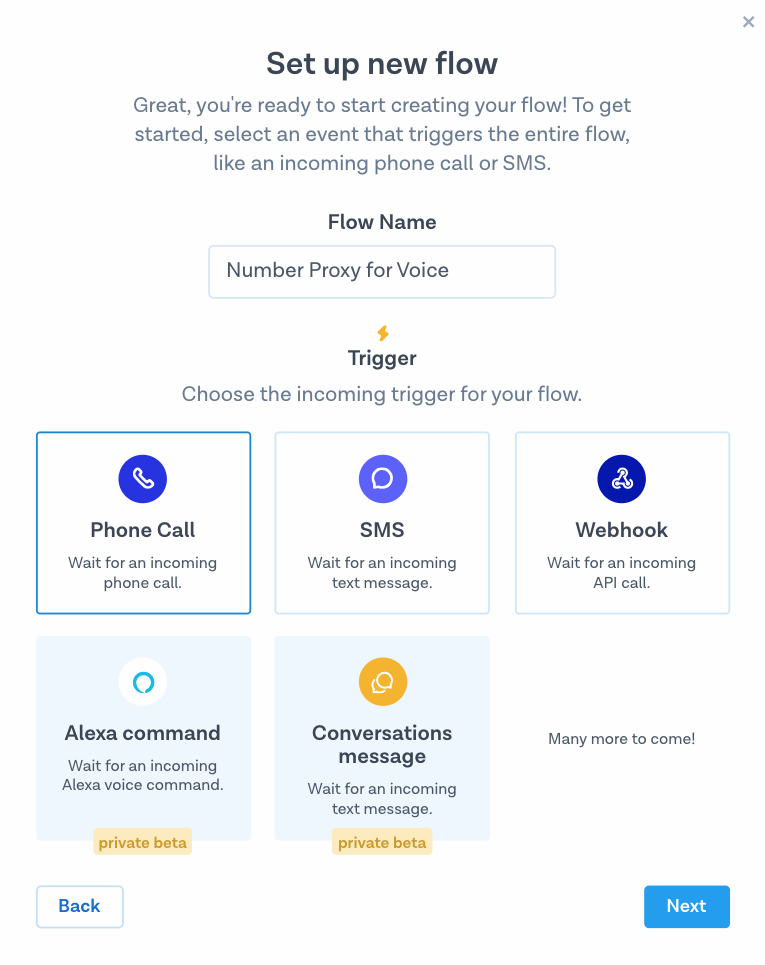
Give your flow a name, choose ‘Phone Call’ as the trigger and hit ‘Next’.
STEP THREE
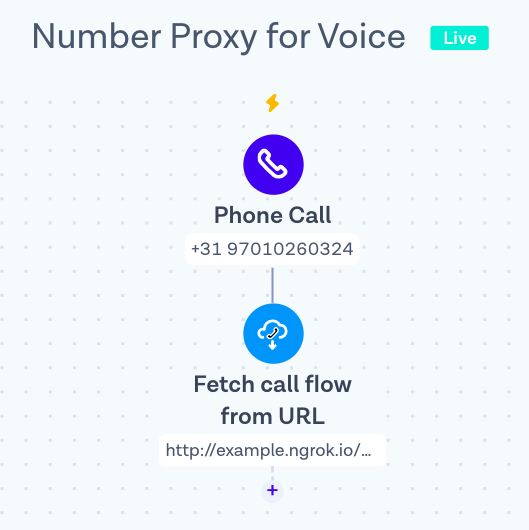
Click on the first step ‘Phone Call’ and select the number or numbers you’d like to attach the flow to.
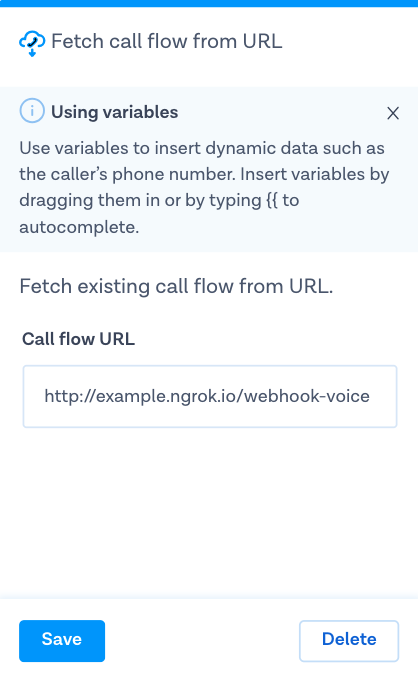
STEP FOUR
Add a new step by pressing the small ‘+’, choose ‘Fetch call flow from URL’ and paste the same localtunnel base URL into the form, but this time append /webhook-voice to it—this is the name of the route we use to handle incoming calls in our sample application. Click on ‘Save’ when ready.
STEP FIVE
Ready! Hit ‘Publish’ on the right top of the screen to activate your flow. Your flow should look something like this:
You're done setting up flows for your application! Now, we can begin writing routes in your application for the /webhook and /webhook-voice URL paths that these flows are using.
Configuring the MessageBird SDK
The MessageBird SDK and an API key are necessary to send and forward messages. The SDK is listed as a dependency in composer.json:
{"require" : {"messagebird/php-rest-api" : "^1.9.4"...}}
An application can access the SDK, which is made available through Composer autoloading, by creating an instance of the MessageBird\Client class. The constructor takes a single argument, your API key. For frameworks like Slim you can add the SDK to the dependency injection container:
// Load and initialize MessageBird SDK$container['messagebird'] = function() {return new MessageBird\Client(getenv('MESSAGEBIRD_API_KEY'));};
As it's a bad practice to keep credentials in the source code, we load the API key from an environment variable using getenv(). To make the key available in the environment variable we need to initialize Dotenv and then add the key to a .env file. We've prepared an env.example file in the repository, which you should rename to .env and add the required information. Here's an example:
MESSAGEBIRD_API_KEY=YOUR-API-KEY
Let's create your live API access key. First, go to the MessageBird Dashboard; if you have already created an API key it will be shown right there. If you don’t see any key on the Dashboard or if you're unsure whether this key is in live mode, go to the Developers section in the MessageBird Dashboard and open the API access (REST) tab. There you can create new API keys and manage your existing ones.
If you are having any issues creating your API key, please reach out to support@messagebird.com; we’ll make sure to help you out.
Creating our data model and sample data
Our BirdCar application uses a relational model. It’s configured with SQLite, which is natively available in PHP and stores all data in a simple file, so you don't have to set up a database server for testing. You should be able to reuse most of the SQL, though, if you want to replace this with a different database in production.
We have the following four entities:
- Customers, who have a name and a phone number.
- Drivers, who also have a name and a phone number.
- Proxy Numbers, which are the phone numbers in our pool.
- Rides, which have a start, destination, and date and time. Every ride references precisely one Customer, Driver, and Proxy Number through the use of foreign keys; every entity has a database table with an auto-incremented numeric ID as its primary key.
Open the file init.php in the repository. It contains four CREATE TABLE queries to set up the data model. Below that, you'll find some INSERT INTO queries to add sample customers, drivers, and proxy numbers. Update those queries like this:
- Enter your name and mobile phone number as a customer.
- Enter another working phone number, such as a secondary phone or a friend's number, as a driver.
- Enter the virtual mobile number you purchased in the MessageBird Dashboard. If you have more than one, copy the query code for each.
After updating the file, save it and run the following command (if you already have ngrok running open a second command prompt for it):
php init.php
Keep in mind that this command only works once, so if you make changes and want to recreate the database, you must delete the file ridesharing.sqlite that the script creates before re-running it:
rm ridesharing.sqlitephp init.php
The admin interface
The $app->get('/') route in index.php and the associated HTML page in views/admin.html.twig implement a simple homepage that lists the content from the database and provides a form to add a new ride. For creating a ride, an admin can select a customer and driver from a drop-down, enter start, destination and date and time. The form submits this information to /createride.
Creating a ride
The $app->post('/createride') route defined in index.php handles the following steps when creating a new ride:
Getting customer and driver information
The form fields contain only IDs for customer and driver, so we’ll make a query for each to find all the information which we need in subsequent steps:
// Create a new ride$app->post('/createride', function($request, $response) {// Find customer details$stmt = $this->db->prepare('SELECT * FROM customers WHERE id = :id');$stmt->execute([ 'id' => $request->getParsedBodyParam('customer') ]);$customer = $stmt->fetch();// Find driver details$stmt = $this->db->prepare('SELECT * FROM drivers WHERE id = :id');$stmt->execute([ 'id' => $request->getParsedBodyParam('driver') ]);$driver = $stmt->fetch();
Finding a number
We need to get a number from the pool that was never been assigned to a ride for the customer or the driver. To check this, let’s write a SQL query with two subqueries:
- Find all numbers for rides from the selected customer (subquery 1)
- Find all numbers for rides from the selected driver (subquery 2)
- Find all numbers that are in neither of those lists and return one of them (main query)
The SQL query looks like this in our PHP code:
// Find a number that has not been used by the driver or the customer$stmt = $this->db->prepare('SELECT * FROM proxy_numbers '. 'WHERE id NOT IN (SELECT number_id FROM rides WHERE customer_id = :customer) '. 'AND id NOT IN (SELECT number_id FROM rides WHERE driver_id = :driver)');$stmt->execute(['customer' => $customer['id'],'driver' => $driver['id']]);$proxyNumber = $stmt->fetch();
It's possible that no proxy number was found. In that case, we alert the admin that the number pool is depleted and they should buy more numbers:
if ($proxyNumber === false) {// No number found!return "No number available! Please extend your pool.";}
Storing the ride
Once a number was found, that is, our query returned a row, it’s time to insert a new ride into the database using the information from the form:
// Store ride in database$stmt = $this->db->prepare('INSERT INTO rides (start, destination, datetime, customer_id, driver_id, number_id) VALUES (:start, :destination, :datetime, :customer, :driver, :number)');$stmt->execute(['start' => $request->getParsedBodyParam('start'),'destination' => $request->getParsedBodyParam('destination'),'datetime' => $request->getParsedBodyParam('datetime'),'customer' => $customer['id'],'driver' => $driver['id'],'number' => $proxyNumber['id']]);
Notifying customer and driver
We should now send a message to both the customer and the driver to confirm the ride. This message should originate from the proxy number, so they can quickly reply to this message to reach the other party. For sending messages, the MessageBird SDK provides the messages->create() function. We need to call the function twice because we're sending two different versions of the message:
// Prepare message object$message = new MessageBird\Objects\Message;$message->originator = $proxyNumber['number'];// Notify the customer$message->recipients = [ $customer['number'] ];$message->body = $driver['name'] . " will pick you up at " . $request->getParsedBodyParam('datetime') . ". Reply to this message or call this number to contact the driver.";try {$this->messagebird->messages->create($message);} catch (Exception $e) {error_log(get_class($e).": ".$e->getMessage());}// Notify the driver$message->recipients = [ $driver['number'] ];$message->body = $customer['name'] . " will wait for you at " . $request->getParsedBodyParam('datetime') . ". Reply to this message or call this number to contact the customer.";try {$this->messagebird->messages->create($message);} catch (Exception $e) {error_log(get_class($e).": ".$e->getMessage());}
As you can see, there's only one MessageBird\Objects\Message object as it’s mutable and can be reused for both messages, only changing the attributes as necessary. If there's any error it’s logged to the console in a catch-block, but we don’t take any action. In production applications, you should definitely check if the messages were sent successfully and implement some more sophisticated error handling.
Receiving and forwarding messages
When a customer or driver replies to the message confirming their ride, the response should go to the other party. As we have instructed MessageBird to post to /webhook, we need to implement the $app->post('/webhook') route.
First, we read the input sent from MessageBird. We're interested in three fields: originator, payload (the message text), and recipient (the virtual number to which the user sent their message), so that we can find the ride based on this information:
// Handle incoming messages$app->post('/webhook', function($request, $response) {// Read input sent from MessageBird$number = $request->getParsedBodyParam('originator');$text = $request->getParsedBodyParam('payload');$proxy = $request->getParsedBodyParam('recipient');
Looking up receiver
To find the ride we use an SQL query which joins all four tables. We're interested in all entries in which the proxy number matches the recipient field from the webhook, and the originator matches either the driver's number or the customer's number:
// Find potential rides that fit the numbers$stmt = $this->db->prepare('SELECT c.number AS customer_number, d.number AS driver_number, p.number AS proxy_number '. 'FROM rides r JOIN customers c ON r.customer_id = c.id JOIN drivers d ON r.driver_id = d.id JOIN proxy_numbers p ON p.id = r.number_id '. 'WHERE proxy_number = :proxy AND (driver_number = :number OR customer_number = :number)');$stmt->execute(['number' => $number,'proxy' => $proxy]);$row = $stmt->fetch();
Forwarding message
After we've found the ride based on an or-condition, we start preparing a MessageBird\Objects\Message object with the proxy number as its originator and the received text as the body. Then we need to check again which party was the actual sender and determine the recipient, the other party that needs to be specified as the recipients attribute, from there:
if ($row !== false) {// Got a match!// Prepare message object$message = new MessageBird\Objects\Message;$message->originator = $proxy;$message->body = $text;// Need to find out whether customer or driver sent this and forward to the other sideif ($number == $row['customer_number'])$message->recipients = [ $row['driver_number'] ];elseif ($number == $row['driver_number'])$message->recipients = [ $row['customer_number'] ];
Then, we use the SDK'S messages->create() to send the message and create a log message for both success and failure cases:
// Forward the message through the MessageBird APItry {$this->messagebird->messages->create($message);error_log("Forwarded text from " . $number . " to " . $message->recipients[0]);} catch (Exception $e) {error_log(get_class($e).": ".$e->getMessage());}
If we haven't found a ride, we also log a message:
} else {// Cannot match numberserror_log("Could not find a ride for customer/driver " . $number . " that uses proxy " . $proxy . ".");}
Receiving and forwarding voice calls
When a customer or driver calls the proxy number from which they received the confirmation, the system should transfer the call to the other party. As we have instructed MessageBird to fetch instructions from /webhook-voice we need to implement the $app->get('/webhook-voice') route. Keep in mind that unlike the SMS webhook, where we have configured POST, custom call flows are always retrieved with GET.
First, the input sent from MessageBird should be read because we're interested in the source and destination of the call so that we can find the ride based on this information:
// Handle incoming calls$app->get('/webhook-voice', function($request, $response) {// Read input sent from MessageBird$number = $request->getQueryParam('source');$proxy = $request->getQueryParam('destination');
As we’ll return a new call flow encoded in XML format, we set the response header accordingly and start writing the response:
// Answer will always be XML$response = $response->withHeader('Content-Type', 'application/xml')->write('<?xml version="1.0" encoding="UTF-8"?>');
Looking up receiver
This works exactly as described for the SMS webhooks; therefore, the SQL query and surrounding PHP code is mostly a verbatim copy. If you’re extending the sample to build a production application, it could be a good idea to make a function as an abstraction around it to avoid duplicate code.
Transferring call
To transfer the call, we return a short snippet of XML to MessageBird, and also log the action to the console:
// Create call flow to instruct transfererror_log("Transferring call to " . $destination);$response->write('<Transfer destination="' . $destination . '" mask="true" />');
The <Transfer /> element takes two attributes: destination indicates the number to transfer the call to—which we've determined as described above—and mask instructs MessageBird to use the proxy number instead of the original caller ID.
If we don't find a ride, we return a different XML snippet with a <Say /> element, which is used to read some instructions to the caller:
} else {// Cannot match numbers$response->write('<Say language="en-GB" voice="female">Sorry, we cannot identify your transaction. Make sure you call in from the number you registered.</Say>');}
This element takes two attributes, language and voice, that define the configuration for speech synthesis. The text itself goes between the opening and closing XML element.
Testing
Make sure you’ve set up at least one number correctly with two flows to forward both incoming messages and incoming phone calls to an ngrok URL, and that the tunnel is still running. Keep in mind that whenever you start a fresh tunnel, you'll get a new URL, so you also have to update it in the flows accordingly.
To start the sample application you have to enter another command, but your existing console window is already busy running your tunnel, so you need to open another one. With Mac you can press Command + Tab to open a second tab that's already pointed to the correct directory. With other operating systems you may have to open another console window manually. Either way, once you've got a command prompt, type the following to start the application:
php -S 0.0.0.0:8080 index.php
Open http://localhost:8080/ in your browser and create a ride between the customer and driver you configured in init.php. Two phones should receive a message; reply to the incoming message on one phone and you'll receive this reply on the other phone, but magically coming from the proxy number. Lovely! You can then test voice call forwarding as well: call the proxy number from one phone and magically see the other phone ring.
If you didn't get the messages or the forwarding doesn't work, check the console output from PHP to see if there's any problem with the API, such as an incorrect API key or a typo in one of the numbers, and try again.
Use the flow, code snippets, and UI examples from this tutorial as an inspiration to build your own application. Don't forget to download the code from the MessageBird Developer Tutorials GitHub repository.
Nice work! 🎉
You've just built your own number masking system with MessageBird using PHP!
Start building!
Want to build something similar but not quite sure how to get started? Please feel free to let us know at support@messagebird.com; we'd love to help!