
Handling Incoming SMS Messages and Voice Calls with MessageBird
⏱ 20 min build time
In this MessageBird Developer Tutorial you’ll learn the basics of handling inbound SMS Messages and Voice Calls at scale. In earlier tutorials, we’ve discussed sending SMS and making outbound calls. What these scenarios have in common is that activity inside your code, such as a user interacting with your application or a background task running on your server, triggers an API request that instructs MessageBird to do something. The opposite behavior, in which a user sending an SMS message or calling you on a MessageBird virtual mobile number should trigger some action in your code, is also extremely useful. This functionality enables you to build solutions like a custom telephony system or implement bots that allow two-way communication over text messaging.
Traditional APIs, including the MessageBird RESTful API that you’ve used with the help of the SDKs, are request-response systems in which an API consumer (you) makes an HTTP request to an API provider (MessageBird) that triggers an action and receives a response in return. If you wanted to build an inbound system with an API, you'd have to resort to polling and continuously ask the API provider, for example, if there are any new messages to process. A better way to implement these scenarios is a pattern commonly known as webhooks, also often named callbacks. Conceptually, webhooks are like a reverse API: Your system exposes an API endpoint at a publicly available URL and provides this URL to your API provider so that they can make an HTTP request to it.
Developing a webhook setup to handle incoming calls or SMS messages involves the following steps:
- Implement a URL/route to receive and process the webhook as part of your application.
- To prepare for testing your webhook endpoint before deploying your application, temporarily make your development environment publicly available. We'll show you how to do this with a third party tunneling provider.
- Assign your development URL to the desired number so that we know which URL to trigger and when. We have implemented webhooks as part of Flow Builder; we've also prepared examples for setting up webhooks.
- Test your integration.
- Deploy your application.
- Update your flow with the production URL.
Creating a Webhook Handler
The webhook handler must be a URL of your application. We recommend that you use a path that is difficult to guess so that only you and MessageBird know about it—to reduce the likelihood of accidental or malicious requests by a third-party. On the other hand, you have to make sure that the URL is publicly accessible. If you use a framework for developing your application, make sure that it doesn’t enforce user authentication or ask for CSRF (Cross-Site-Request-Forgery) tokens on the path.
Keep in mind that you don’t need a MessageBird SDK to receive webhooks, but depending on your use case you may need it to act upon it by sending a reply message or call.
The following sections describe the conceptual basics of receiving and replying to webhooks; they don’t contain any code examples. If you need specific advice to your programming language you can check our MessageBird Developer Tutorials for full examples of several scenarios involving incoming messages and calls.
Generally, webhooks come in different flavors. Most webhooks act as a simple push mechanism to inform you about events that have happened and leave it up to your application to deal with the notification (or ignore it) on its own terms. Other webhooks treat your application as a plugin and expect some data as a response to control the flow at the API provider's side further. MessageBird SMS webhooks are an example of the former, while incoming call webhooks are an example of the latter.
SMS WEBHOOKS
You can set up your SMS handler with any HTTP method, but we strongly recommend you to use POST. The method you specify in your application must be the same that you'll configure later in Flow Builder. MessageBird sends inbound SMS as form-encoded requests so you can read the input just as if it were an HTML form submitted by a user of your application.
There are a variety of fields, but most applications only need the following two:
- The originator is the phone number that sent the message to you. It will be provided in the international format with country code.
- The payload is the content of the message.
Your application can return any or even an empty response to a webhook. MessageBird doesn’t read replies. You should just make sure that you don’t return an HTTP error status code.
If you want to reply to the message, simply follow the instructions for sending SMS for your programming language and add the originator from the webhook to the recipients parameter of the outgoing message.
CALL WEBHOOKS
For call webhooks, you must use the HTTP GET method in your application. Call webhooks are actually called ‘Retrieve a Call Flow from a URL’, which means that they expect you to return a call flow. When a person calls a virtual number assigned to such a URL via Flow Builder, we’ll make an HTTP request to your application and retrieve the flow. This flow describes what the caller hears; if the flow is invalid, the caller hears a failure message and the call disconnects.
Since it's a GET, we send parameters in the query string. For most applications you should only need the source field which indicates the phone number that is calling you; it will be provided in the international format with country code.
Your application should return a call flow encoded as JSON or XML with the appropriate content type, for example, application/json for a JSON-encoded call flow or application/xml for an XML-encoded call flow. Here’s an example of an XML-encoded call flow with a single step:
<?xml version="1.0" encoding="UTF-8"?><Say language="en-GB" voice="female">Hello, thanks for calling!</Say>
You can check our Voice Calling API documentation for a list of available step actions and their options.
Tunneling Providers
A local web server on your development machine is typically not available on the public Internet. There are changing dynamic IP addresses, firewalls and network address translation (NAT) in your router or inside the carrier network standing in the way; while this is indeed great from a security perspective, it makes testing inbound requests to web applications difficult.
Don’t worry! The best workaround is a tunneling service. They come with small client software that runs on your computer and opens an outgoing permanent connection to a publicly available server in a data center. Then, they assign a public URL—typically on a random or custom subdomain—on that server to your account; the public server acts as a proxy that accepts incoming connections to your URL, forwards (tunnels) them through the already established connection and sends them to the local web server as if they originated from the same machine.
NGROK
One of the most popular tunneling tools is ngrok. You can download ngrok for free as a single-file binary for almost every operating system, or optionally sign up for an account to access additional features.
You can start a tunnel by providing a local port number on which your application runs. For example, if your web server is using port 8080, you can launch your tunnel with this command:
ngrok http 8080
After you’ve launched the tunnel, ngrok displays your temporary public URL along with some other information.
LOCALTUNNEL
Another great tool is localtunnel.me, which is uniquely suited to Node.js developers since you can comfortably install it using npm:
npm install -g localtunnel
You can start a tunnel by providing a local port number on which your application runs. For example, if your web server is using port 8080, you can launch your tunnel with this command:
lt --port 8080
After you've started the tunnel, localtunnel displays your temporary public URL.
OTHER TOOLS
If you’re not happy using either of these, you can have a look at Pagekite or Forward.
Webhooks in the Flow Builder
You can use Flow Builder to design complex interactions with incoming calls or messages without writing code; you can also create simple flows with an SMS or call trigger and forwarding them to the webhook endpoint URL of your application.
SETTING UP A FLOW FOR SMS
Let’s set up a simple flow to receive inbound SMS on a virtual number in just three steps:
Step one
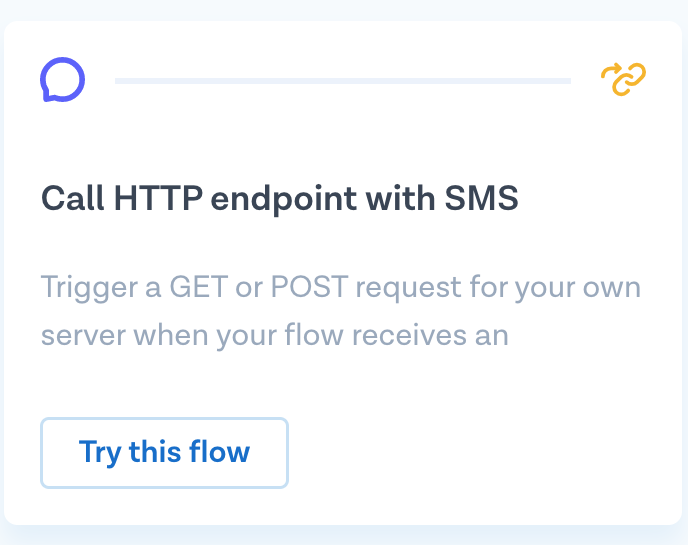
Go to Flow Builder, choose the template ‘Call HTTP endpoint with SMS’ and click ‘Try this flow’.
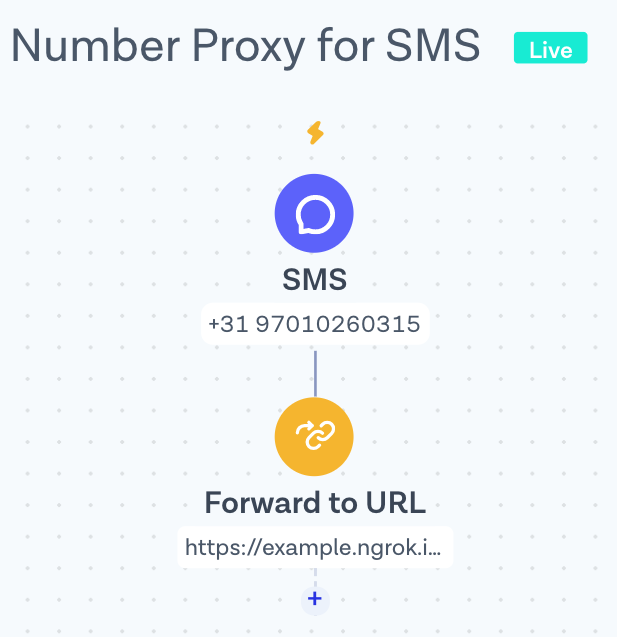
Step two
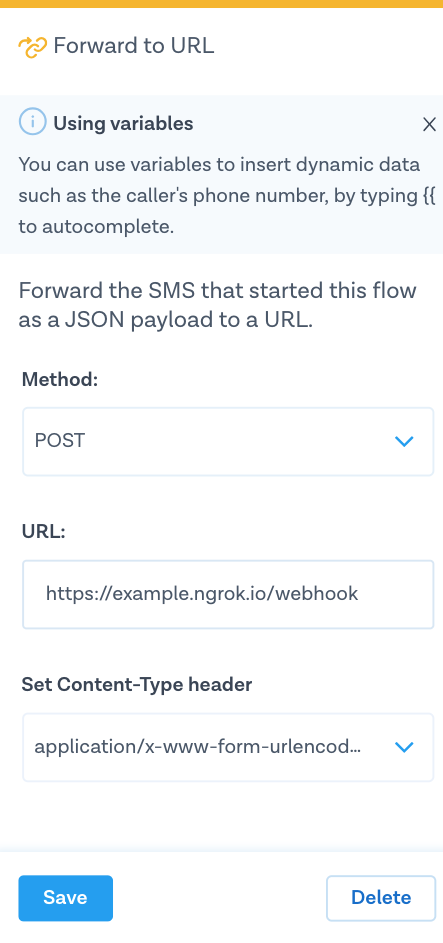
This template has two steps. Click on the first step ‘SMS’ and select the number or numbers you’d like to attach the flow to. Now, click on the second step ‘Forward to URL’ and choose POST as the method; copy the output from the lt command in the URL and add /webhook at the end—this is the name of the route we use to handle incoming messages in our sample application. Click on ‘Save’ when ready.
Step three
Ready! Hit ‘Publish’ on the right top of the screen to activate your flow.
You can see our video tutorial and detailed article in Help Center for learning how to trigger a GET or POST request for your own server with Flow Builder.
SETTING UP A FLOW FOR CALLS
Set up a simple flow to handle incoming calls on a virtual number in just a few steps:
Step one
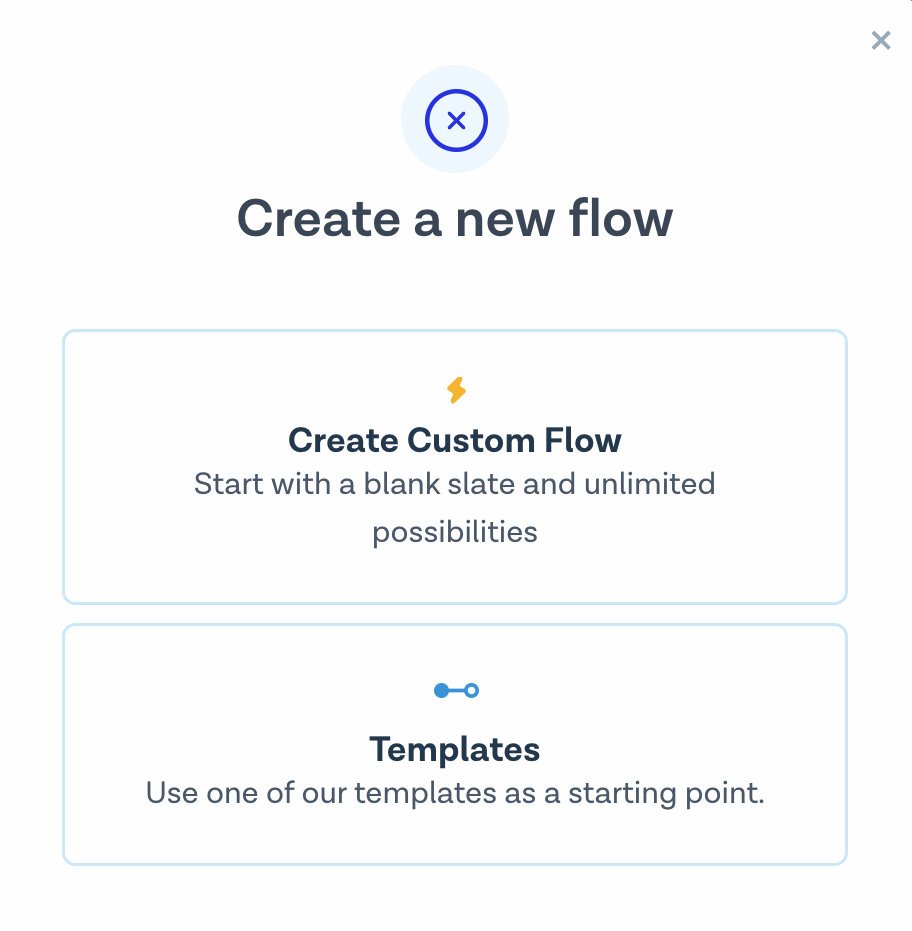
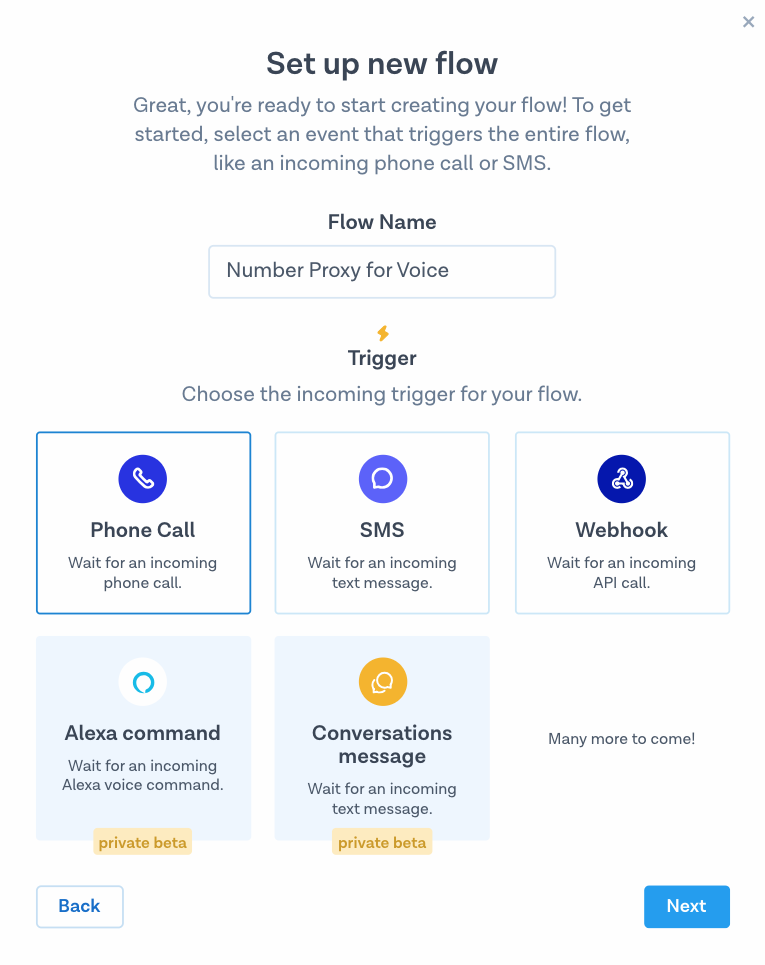
Go back to Flow Builder, hit the button ‘Create new flow’ and then ‘Create Custom Flow’.
Step two
Give your flow a name, choose ‘Phone Call’ as the trigger and hit ‘Next’.
Step three
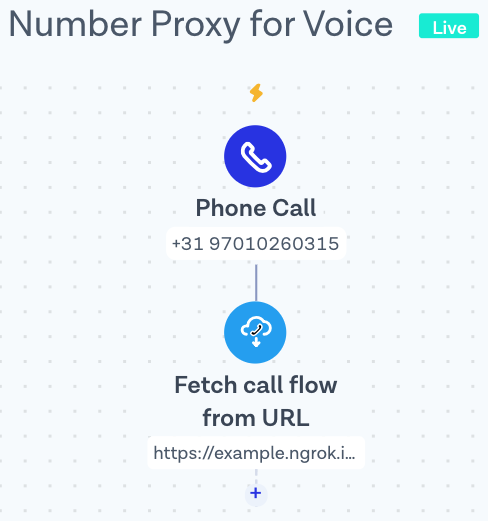
Click on the first step ‘Phone Call’ and select the number or numbers you’d like to attach the flow to.
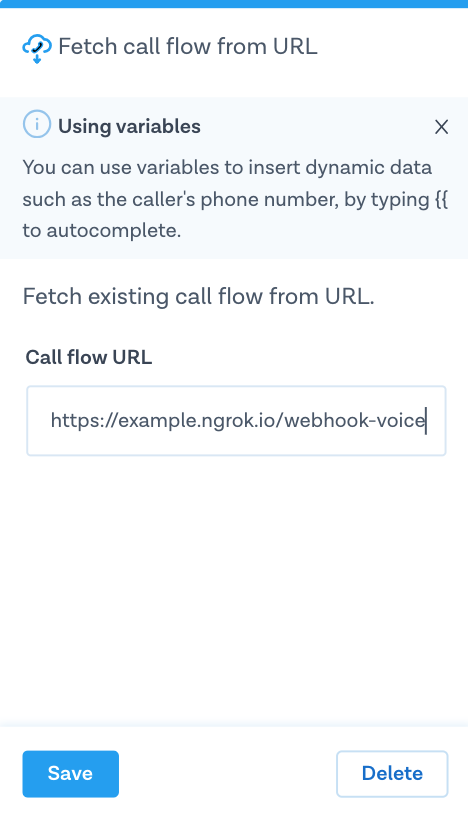
Step four
Add a new step by pressing the small ‘+’, choose ‘Fetch call flow from URL’ and paste the same localtunnel base URL into the form, but this time append /webhook-voice to it—this is the name of the route we use to handle incoming calls in our sample application. Click on ‘Save’ when ready.
Step five
Ready! Hit ‘Publish’ on the right top of the screen to activate your flow.
Nice work! 🎉
You’re now know how to handle incoming Voice Calls and SMS Messages at scale!
Start building!
Head over to more MessageBird Developer Tutorials for common SMS, Voice and Chat use-cases.
Want to start building your solution but not quite sure how to get started? Feel free to let us know at support@messagebird.com; we'd love to help!