
Getting Started with MessageBird
⏱ 15 min read
This MessageBird Developer Tutorial will teach you the basics of getting started with MessageBird’s Dashboard and APIs.
Sign up for free
First things first, let's head over to www.messagebird.com and sign up for a free test account - no credit card is required to sign up and start testing. Begin by completing all the required fields, check your inbox for the confirmation email and tada! 🎉 You now have an active MessageBird account.
Claim free test credits & API Key
First, we need to verify you're human and as a reward, you'll receive 10 free test credits that you can use to test MessageBird’s APIs.
Pro-Tip: You can only use test credits to send messages to your own verified number. You can skip this step and go straight to top-up your balance and/or purchasing a virtual mobile number.
If you run out of test credits but aren't quite done testing, just let us know at support@messagebird.com; we'd love to help.
Create your API key
To enable any MessageBird SDK, you’ll need to provide an API access key.
MessageBird provides keys in live and test modes for different purposes:
- To send live messages, you’ll need to create and use a live API access key.
- To simply test the API, you can use a test API access key. No messages will be sent in this case.
Pro-Tip: You can read more about the difference between test and live API keys in our Help Center.
So let's create your live API access key. First, go to the MessageBird Dashboard; if you have already created an API key it will be shown right there. If you don’t see any key on the Dashboard or if you're unsure whether this key is in live mode, go to the Developers section in the MessageBird Dashboard and open the API access (REST) tab. Here, you can create new API keys and manage your existing ones.
If you’re having any issues creating your API key, please reach out to support@messagebird.com; we’ll make sure to help you out.
Purchase a virtual mobile number
MessageBird offers numbers from different countries for a low monthly fee; feel free to explore our low-cost programmable and configurable numbers. Purchasing a number is quite easy:
Go to the ‘Numbers’ section in the left-hand side of your Dashboard and click the blue button ‘Buy a number’ in the top-right side of your screen.
Pick the country in which you and your customers are located, and make sure you select the capabilities that you need: SMS, MMS, Voice (you can select more than one!)
Choose one number from the selection and the duration for which you want to pay now.
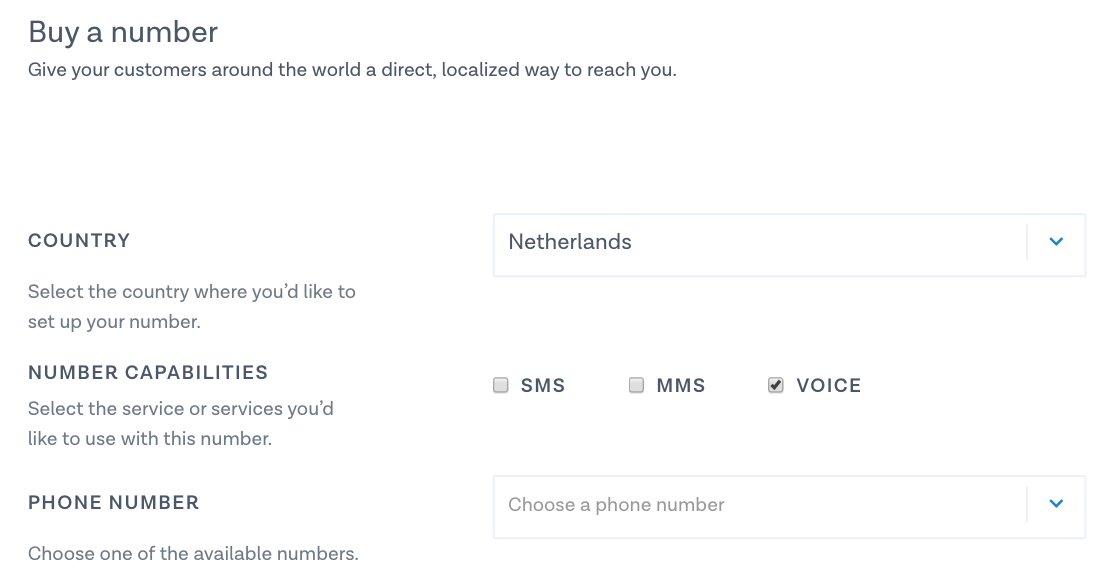
Confirm by clicking ‘Buy Number’ in the bottom-right of your screen.
Congratulations, you’ve set up your first virtual mobile number! 🎉
Pro-Tip: Check out our Help Center for more information about virtual mobile numbers and country restrictions.
How to upgrade your MessageBird account
If you're done testing or want to skip straight to sending live messages to numbers other than your own, it's time to upgrade your account by topping up your balance. You can do this in a two ways:
Top-up via your Dashboard
Just hit the +Top-up button in the top left-hand corner of your Dashboard. You choose your desired balance, proceed to checkout and select your payment method. Keep in mind that the minimum balance purchase amount is €15,00.
Set up auto top-up
Want to set and forget? Head over to Preferences to configure your ‘Auto order’ settings. You can also configure a low balance warning, so you’re notified when your balance goes below a certain amount.
Nice work! 🎉
You’re all ready to start with the MessageBird Dashboard and APIs!
Start building!
Start building your communications solution by checking out more MessageBird Developer Tutorials for common SMS, Voice and Chat use-cases.
Want to get started but not quite sure how? Feel free to let us know at support@messagebird.com; we'd love to help.