
Building automated voice surveys with MessageBird
⏱ 15 min build time || Download the Code
Why build automated voice surveys?
In this MessageBird Developer Tutorial, you’ll learn how to gather valuable information from your users with this fully automated voice survey application powered by the MessageBird Voice Calling API.
Surveys are a great way to gather feedback about a product or service. Here we'll look at a company that wants to collect surveys over the phone by providing their customers a feedback number that they can call, submit their opinion as voice messages that the company's support team can listen to on a website, and incorporate that feedback into the next version of the product. This team should be able to focus their attention on the input instead of having to wait and answer calls; therefore, the feedback collection itself is fully automated.
Getting started
Our sample application is built in Node.js using the Express framework, so you’ll need Node and npm, you can easily install them for free.
The source code is available in the MessageBird Developer Tutorials GitHub repository, which you can either clone with git or from where you can download a ZIP file with the source code to your computer.
After saving the code, open a console for the download directory and run the following command which downloads the Express framework, MessageBird SDK, and other dependencies defined in the package.json file:
npm install
The sample application uses mongo-mock to provide an in-memory database for testing, so you don't need to configure an external database. As the mock loses data when you restart the application, you need to replace it with a real MongoDB server when you want to develop this sample into a production application.
Designing the call flow
Call flows in MessageBird are sequences of steps. Each step can be a different action, such as playing an audio file, speaking words through text-to-speech (TTS), recording the caller's voice or transferring the call to another party. The call flow for this survey application alternates two types of actions: saying the question (say action) and recording an answer (record action). Other action types are not required. The whole flow begins with a short introduction text and ends on a "Thank you" note, both of which are implemented as say actions.
The survey application generates the call flow dynamically through Javascript code and provides it on a webhook endpoint as a JSON response that MessageBird can parse; however, it doesn’t return the complete flow at once. The generated steps always end on a record action with the onFinish attribute set to the same webhook endpoint URL. This approach simplifies the collection of recordings because whenever the caller provides an answer, an identifier for the recording is sent with the next webhook request. The endpoint will then store information about the answer to the question and return additional steps: either the next question together with its answer recording step or, if the caller has reached the end of the survey, the final “Thank you” note. The sample implementation contains only one survey. For each participant, we create a (mocked) MongoDB document that includes a unique MessageBird—generated identifier for the call, their number, and an array of responses. As the webhook is requested multiple times for each caller, once in the beginning and once for each answer they record, the length of the responses array indicates their position within the survey and determines the next step.
All questions are stored as an array in the file questions.json to keep them separate from the implementation. The following statement at the top of index.js loads them:
var questions = require('./questions.json');
Prerequisites for receiving calls
Overview
Participants take part in a survey by calling a dedicated virtual phone number. MessageBird accepts the call and contacts the application on a webhook URL, which you assign to your number on the MessageBird Dashboard using Flow Builder. A webhook is a URL on your site that doesn't render a page to users but is like an API endpoint that can be triggered by other servers. Every time someone calls that number, MessageBird checks that URL for instructions on how to interact with the caller.
Exposing your development server with localtunnel
When working with webhooks, an external service like MessageBird needs to access your application, so the webhook URL must be public; however, during development you're typically working in a local development environment that is not publicly available. Thankfully this is not a big deal since various tools and services allow you to quickly expose your development environment to the Internet by providing a tunnel from a public URL to your local machine. One of these tools is localtunnel.me, which is uniquely suited to Node.js developers since you can easily install it using npm:
npm install -g localtunnel
You can start a tunnel by providing a local port number on which your application runs. Our application is configured to run on port 8080, so you can start localtunnel with the following command:
lt --port 8080
After you've launched the tunnel, localtunnel displays your temporary public URL. We'll need that in a minute.
Another common tool for tunneling your local machine is ngrok, which works virtually in the same way; you can have a look at it if you're facing problems with localtunnel.
Getting an inbound number
A requirement for receiving messages is a dedicated inbound number. Virtual mobile numbers (VNM) look and work similar to regular mobile numbers; however, instead of being attached to a mobile device via a SIM card, they live in the cloud and can process inbound SMS and voice calls. MessageBird offers numbers from different countries for a low monthly fee; feel free to explore our low-cost programmable and configurable numbers.
Purchasing a number is quite easy:
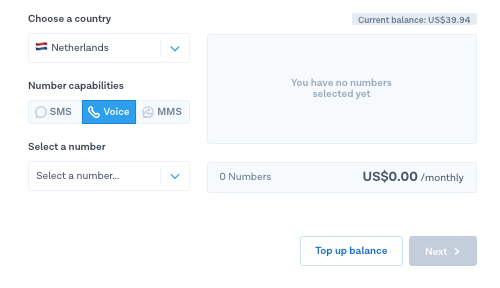
Go to the ‘Numbers’ section in the left-hand side of your Dashboard and click the blue button ‘Buy a number’ in the top-right side of your screen.
Pick the country in which you and your customers are located, and make sure the Voice capability is selected.
Choose one number from the selection and the duration for which you want to pay now.
Confirm by clicking ‘Buy Number’ in the bottom-right of your screen.
Awesome, you’ve set up your first virtual mobile number! 🎉 Pro-tip: Check out our Help Center for more information about virtual mobile numbers and country restrictions.
Connecting the number to your application
So you have a number now, but MessageBird has no idea what to do with it. That's why now you need to define a Flow that links your number to your webhook.
STEP ONE
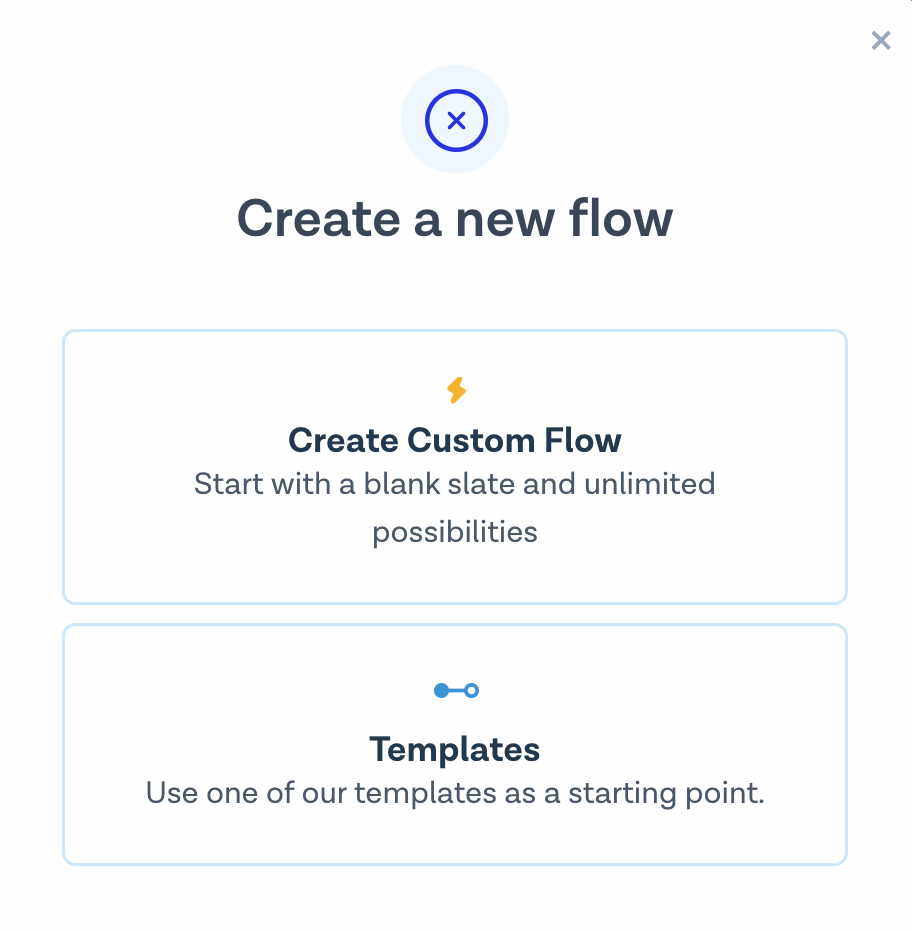
Go back to Flow Builder and hit the button ‘Create new flow’ and then ‘Create Custom Flow’.
STEP TWO
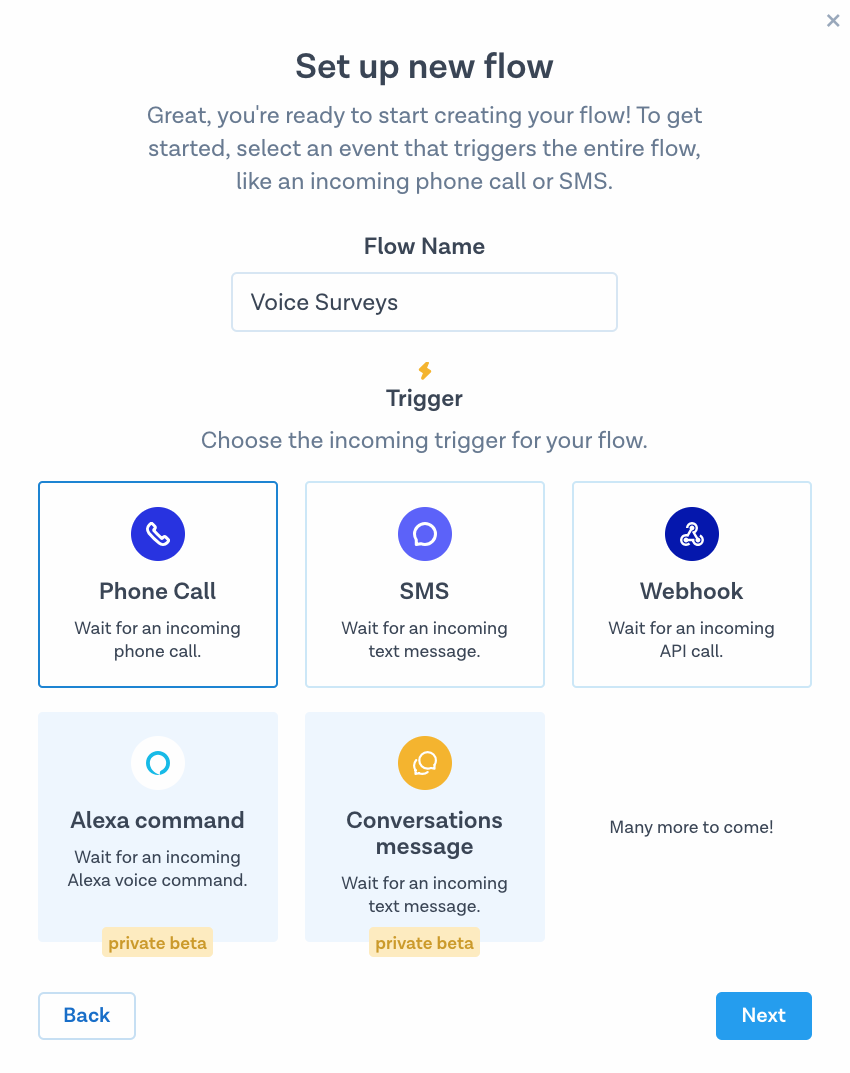
Give your flow a name, choose ‘Phone Call’ as the trigger and hit ‘Next’.
STEP THREE
Click on the first step ‘Phone Call’ and select the number or numbers you’d like to attach the flow to.
STEP FOUR
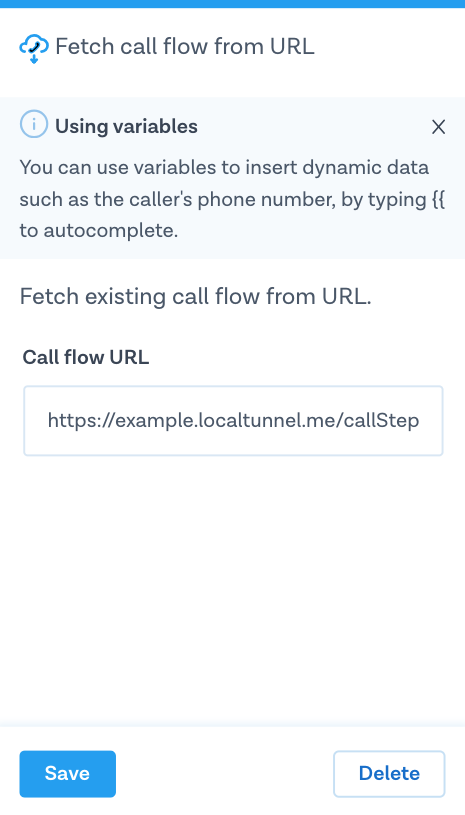
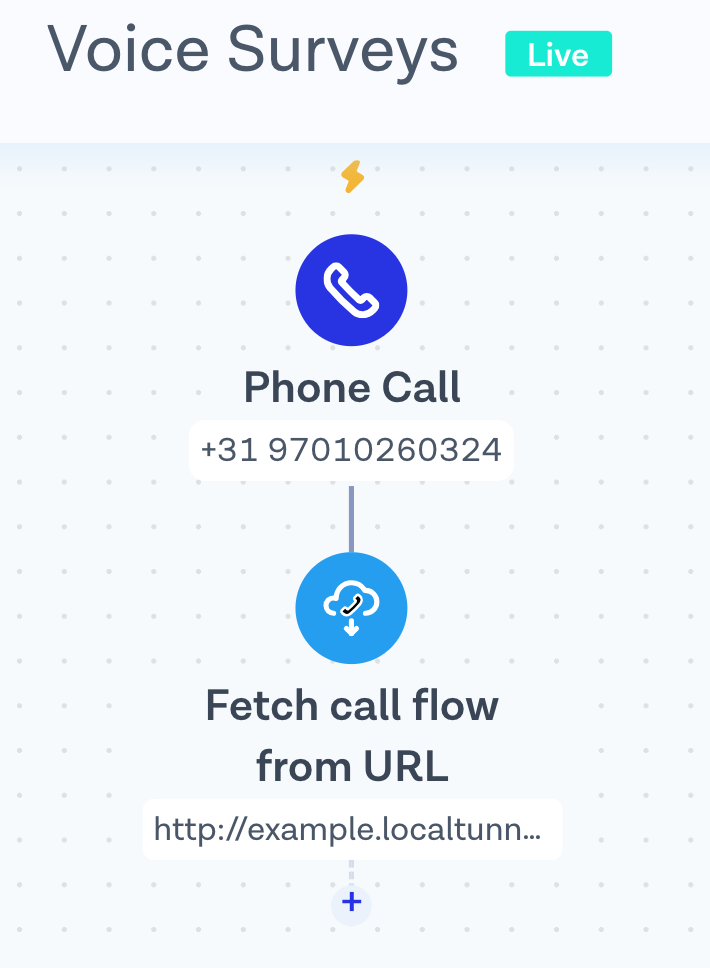
Add a new step by pressing the small ‘+’, choose ‘Fetch call flow from URL’ and paste the localtunnel base URL into the form and append /callStep to it-this is the name of our webhook handler route. Click on ‘Save’ when ready.
STEP FIVE
Ready! Hit ‘Publish’ on the right top of the screen to activate your flow. Your flow should look something like this:
Implementing the call steps
The route app.all('/callStep') in index.js contains the implementation of the survey call flow. It is specified with all() because the first request to fetch the call flow uses GET and subsequent requests that include recording information use POST. It starts with the basic structure for a JSON call flow object called flow, which we'll extend depending on where we are within our survey:
app.all('/callStep', function(req, res) {// Prepare a Call Flow that can be extendedvar flow = {steps : []};
Next, let’s connect to MongoDB, select a collection and try to find an existing call:
MongoClient.connect(dbUrl, {}, function(err, db) {var surveyParticipants = db.collection('surveyParticipants');// Find a database entry for the numbersurveyParticipants.findOne({ callId : req.query.callID },function(err, doc) {
The application continues inside the callback function. First, we determine the ID (array index) of the next question, which is 0 for new participants or the number of existing answers plus one for existing ones:
// Determine the next questionvar questionId =doc == null? 0 // The person is just starting the survey: doc.responses.length + 1;
For new participants, we also need to create a document in the MongoDB collection and persist it to the database. This record contains the identifier of the call and the caller ID, which are taken from the query parameters sent by MessageBird as part of the webhook (call flow fetch) request, callID, and destination respectively. It includes an empty responses array as well.
if (doc == null) {// Create new participant database entryvar doc = {callId: req.query.callID,number: req.query.destination,responses: [],};surveyParticipants.insertOne(doc, function(err, result) {console.log('created survey participant', err, result);});}
Next, if we're not in the initial but a subsequent webhook request, we would have received a JSON payload with data about the recording. If you scroll up in index.js you'll find the initialization code for the Express framework. Among other things, it configures the body-parser helper library to accept JSON inputs. As MessageBird sends the inputs without Content-Type, we need to adjust the following configuration:
app.use(bodyParser.json({type: function(req) {// Parse all bodies as JSON even without Content-Typereturn true;},}),);
Let's move back to our route's implementation. The answers are persisted by adding them to the responses array and then updating the document in the MongoDB collection. For every answer we store two identifiers from the parsed JSON request body: the legId that identifies the caller in a multi-party voice call and is required to fetch the recording, as well as the id of the recording itself which we store as recordingId:
if (questionId > 0) {// Unless we're at the first question, store the response// of the previous questiondoc.responses.push({legId: req.body.legId,recordingId: req.body.id,});surveyParticipants.updateOne({ number: req.query.destination },{$set: {responses: doc.responses,},},function(err, result) {console.log('updated survey participant', err, result);},);}
It's time to ask a question. Let's first check if we reached the end of the survey. That is determined by whether the question index equals the length of the questions list and therefore is out of bounds of the array, which means there are no further questions; if so, we thank the caller for their participation:
if (questionId == questions.length) {// All questions have been answeredflow.steps.push(say("You have completed our survey. Thank you for participating!"));
Did you notice the say() function? It’s a small helper function we've declared separately in the initial section of index.js to simplify the creation of say steps as we need them multiple times in the application. The say() function returns the action in the format expected by MessageBird so it can be added to the steps of a flow using push(), as seen above. A function like this allows setting options for say actions at a central location. You can modify it if you want to, for example, specify another language or voice.
function say(payload) {return {action: 'say',options: {payload: payload,voice: 'male',language: 'en-US',},};}
Back in the route, there's an else-block that handles all questions other than the last; however, there's another nested if-statement in it to treat the first question, since we need to read a welcome message to our participant before the question:
} else {if (questionId == 0) {// Before first question, say welcomeflow.steps.push(say("Welcome to our survey! You will be asked " + questions.length + " questions. The answers will be recorded. Speak your response for each and press any key on your phone to move on to the next question. Here is the first question:"));}
Finally, here comes the general logic used for each question:
- Ask the question using say
- Request a recording
// Ask next questionflow.steps.push(say(questions[questionId]));// Request recording of questionflow.steps.push({action: 'record',options: {// Finish either on key press or after 10 seconds of silencefinishOnKey: 'any',timeout: 10,// Send recording to this same call flow URLonFinish: req.protocol + '://' + req.hostname + '/callStep',},});
The record step is configured so that it finishes when the caller presses any key on their phone's keypad (finishOnKey attribute) or when MessageBird detects 10 seconds of silence (timeout attribute). By specifying the URL with the onFinish attribute, we can make sure that the recording data is sent back to our route and that we can send additional steps to the caller. Building the URL with protocol and hostname information from the request ensures that it works wherever the application is deployed and also behind the tunnel.
Only one tiny part remains: the last step in each webhook request is sending back a JSON response based on the flow object:
res.json(flow);
Building an admin view
The survey application also contains an admin view that allows us to view the survey participants and listen to their responses. The implementation of the app.get('/admin') route is straightforward: it essentially loads everything from the database plus the questions data and adds it to the data available for a Handlebars template.
The template, which you can see in views/participants.handlebars, contains a basic HTML structure with a three-column table. Inside the table, two nested loops over the participants and their responses add a line for each answer with the number of the caller, the question, and a “Listen” button that plays it back.
Let's have a more detailed look at the implementation of this “Listen” button. On the frontend, the button calls a Javascript function called playAudio() with the callId, legId and recordingId inserted through Handlebars expressions:
<button onclick="playAudio('{{p.callId}}','{{this.legId}}','{{this.recordingId}}')">Listen</button>
The implementation of that function dynamically generates an invisible, auto-playing HTML5 audio element:
function playAudio(callId, legId, recordingId) {document.getElementById('audioplayer').innerHTML ='<audio autoplay="1"><source src="/play/' +callId +'/' +legId +'/' +recordingId +'" type="audio/wav"></audio>';}
As you can see, the WAV audio is requested from a route of the survey application. This route acts as a proxy server that fetches the audio from the MessageBird API and uses the pipe() function to forward it to the frontend. This architecture is necessary because we need a MessageBird API key to fetch the audio, but don't want to expose it on the client-side of our application. We use request to make the API call and add the API key as an HTTP header:
app.get('/play/:callId/:legId/:recordingId', function(req, res) {// Make a proxy request to the audio file on the APIrequest({url:'https://voice.messagebird.com/calls/' +req.params.callId +'/legs/' +req.params.legId +'/recordings/' +req.params.recordingId +'.wav',headers: {Authorization: 'AccessKey ' + process.env.MESSAGEBIRD_API_KEY,},}).pipe(res);});
You need to provide a MessageBird API key via an environment variable loaded , let’s do it by using dotenv. We've prepared an env.example file in the repository, which you should rename to .env and add the required information. Here's an example:
MESSAGEBIRD_API_KEY = YOUR - API - KEY;
Go to the MessageBird Dashboard; if you have already created an API key it will be shown right there. If you don’t see any key on the Dashboard or if you're unsure whether this key is in live mode, go to the Developers section in the MessageBird Dashboard and open the API access (REST) tab. There you can create new API keys and manage your existing ones.
Testing
You’re done! It’s time to test your application.
Double-check that you’ve set up your number correctly with a flow that forwards incoming phone calls to a localtunnel URL and that the tunnel is still running. Keep in mind that whenever you start a fresh tunnel, you'll get a new URL, so you have to update it in the flows accordingly. You can also configure a more permanent URL using the -s attribute with the lt command.
To start the sample application you have to enter another command, but your existing console window is already busy running your tunnel, so you need to open another one. With Mac you can press Command + Tab to open a second tab that's already pointed to the correct directory. With other operating systems you may have to open another console window manually. Either way, once you've got a command prompt, type the following to start the application:
npm start
Now, take your phone and dial your survey number. You should hear the welcome message and the first question; speak an answer and press any key, at that moment you should see some database debug output in the console. Open http://localhost:8080/admin to see your call as well.Continue interacting with the survey. In the end, you can refresh your browser and listen to all the answers you recorded within your phone call.
Supporting outbound calls
The application was designed for incoming calls where survey participants call a virtual number and can provide their answers. The same code works without any changes for an outbound call scenario as well, all you have to do is start a call through the API or other means and use a call flow that contains a fetchCallFlow step pointing to your webhook route.
Awesome! You can now leverage the flow, code snippets, and UI examples from this tutorial to build your own automated voice survey. Don't forget to download the code from the MessageBird Developer Tutorials GitHub repository.
Nice work! 🎉
You now have a running integration of MessageBird's Voice API using Node.js!
Start building!
Want to build something similar but not quite sure how to get started? Feel free to let us know at support@messagebird.com; we'd love to help!